Parsnips – they’re back! A Moroccan style soup with chickpeas and harissa topped with garlic scented toasted breadcrumbs
October 25, 2013
 This week brings the first of this season’s parsnips which for me always mean autumn. A member of the carrot family, they are sweet with a gorgeous earthiness so they work really well with things like butter, garlic, parsley, potatoes, honey, curry, cinnamon and nutmeg. They can be boiled, pureed, mashed and deep-fried but I think roasting really brings up their lovely flavour and it really couldn’t be an easier way to go. Simply peel and cut them into even-sized chunks then heat some olive oil in a roasting tin. Toss in the parsnips and roast for about 45 minutes. As you’d expect, these are brilliant with an roast dinner but you can also use them with veggie meals like say, a spiced (try cumin, chilli and garlic) cous cous. My recipe this week is for a warming Moroccan style soup with cumin seeds, Harissa and lots of garlic (great for fighting oncoming colds as the weather starts to turn wintery). Harissa, if you haven’t had it before, is a thick spicy Moroccan chilli paste you get in Middle Eastern shops and good delis. This soup has heat but won’t blow your head off. We all had it for dinner last night and the kids ate it quite happily. If it’s more fire you’re after just add more Harissa.
Moroccan style soup with parsnips, chickpeas and Harissa served with garlic scented toasted breadcrumbs
You’ll need:
1 medium onion
Olive oil
2 medium carrots (roughly 200gr)
2 medium parsnips (roughly 250-300gr)
2 bay leaves 5 cloves garlic roughly chopped
1 teaspoon cumin seeds
2L vegetable stock (Marigold as always unless you make your own)
1 tin chickpeas Harrissa To garnish;
A handful breadcrumbs
1 clove garlic
Olive oil
Sweet roasted butternut and a soup with Parmesan and thyme
October 15, 2013

This week I’ve got the last of this season’s butternut squash. After this any of the stuff you see around is most likely to be from another hemisphere. I love butternut but not enough to have it make a journey from Argentina. If you haven’t cooked it before, butternut squash makes all kinds of wonderful soups, gratins and stews. It’s also great served on its own (roasted, boiled, steamed or fried) then dressed with a little sea salt, olive oil and the tiniest dash of balsamic vinegar.
Flavourwise, its earthy and quite sweet (which makes it a great weaning food for babies) and goes very well with garlic, leeks, onions, potatoes, chiles, maple syrup, brown sugar, cinnamon, nutmeg, parsley, sage and orange. Most recipes call for just the flesh and getting the skin off does look daunting but it’s not really. I find the best way is to quarter it first and then peel. After that, take out the seeds and stringy bits and cut the flesh as required. And what a lot of people don’t know is if you roast your butternut the skin ends up soft enough to eat which makes things even easier.
One of the simplest ways to cook butternut comes from a friend who reckons she got the recipe in New Zealand.You basically cut your butternut in half and stick in the oven so it really couldn’t be less labour intensive…..
Sweet roasted Butternut
You’ll need:
Butternuts (of course!!!!)
Butter
Brown sugar
Sea salt
Cinnamon or chili
Clean the skin and cut the butternut in half, then roast it softside up for 20 minutes. Turn it over and smear the flesh with butter, brown sugar, a generous pinch of sea salt and either a pinch of cinnamon or chili.

Return to the oven and roast for a further 30 to 40 minutes depending on the size of your squash or until the flash has caramelised.
This is fantastic served with lamb, pork or some baked feta cheese with a cous cous salad dressed with olive oil, toasted pine nuts and plenty of chopped rocket or flatleaf parsley.

With the weather so horrible it had to be soup today and I made one of my favourites – butternut, with Parmesan and thyme. It’s quite a simple recipe but it gives knockout results. I’ve served it on Christmas day it’s that good. The sharp salty tang of the cheese combines with the thyme to give an almost meaty flavour that’s incredibly moreish. There’s a little cream in there too which means it’s nicely filling aswell.
Butternut Soup with Parmesan and Thyme (for 2 as a lunch or 3 as a starter)
You’ll need:
500gr peeled butternut
60ml olive oil
1 small onion chopped
4 cloves garlic finely chopped
1 tablespoon fresh thyme leaves or 1 teaspoon dried
750ml vegetable stock (as usual I cheat and use Marigold)
2 tablespoons double cream
3 tablespoons grated Parmesan and some Parmesan shavings for garnish (make these with your veg peeler)
Sour cream for garnishing at the end – not absolutely crucial and some regular cream or yogurt will also do fine
Heat the olive oil in a pot over a lowish heat then very gently sweat the butternut for about 5 minutes then add the onion, garlic and thyme. Continue cooking gently for another 10 minutes. Turn up the heat a little and add the vegetable stock in 3 stages stirring well between each addition. Bring everything to the boil then reduce to a gentle simmer, season with salt and pepper then cover and continue cooking for a further 25 minutes.

To finish the soup off add 2 tablespoons of double cream and the grated Parmesan. Check and correct the seasoning if necessary then cook for a further 5 minutes. Remove from the heat and allow to cool slightly before blending until smooth adding a little more stock if necessary to get the consistency you want. Before serving reheat and garnish with a drizzle of sour cream if you have it and some Parmesan shavings. Don’t forget that soup freezes really well so it’s worth making a double or triple quantity you can use spuds and/or carrots to make up any shortfall on the butternut front.
What to do when bananas go bad………..
September 16, 2013

It happens. They get left in the bowl and sudddenly it’s too late, no-one wants them. Don’t throw them out they’re are great for all kinds of things. Smoothies are an obvious and super fast approach. Yogurt, milk, a little ice if you like (I don’t) and you’re set. A lot of recipes specify a sweetener but you really don’t need one. A handful of berries, dollop of tahini, peanut, or any other nut butter along with also makes this very special.
At the moment the whole back to school thing has me in a spin, scrambling around trying to remember mid-afternoon snacks that tide kids (and sometimes grown-ups) over till dinner (while trying to figure out what’s actually for said dinner….) Smoothies are perfect and this one is very popular at the moment….

Super-healthy Chocolate Banana Smoothie
You’ll need:
200ml milk
2 dollops yogurt
1 heaped tablespoon cocoa powder
2 tablespoons flaxseed oil (brilliant source of Omega 3 oils)
1 heaped tablespoon flax seed (for fibre)
1 large ripe banana
Put everything in a blender and blast til smooth. Serve cold.

The other great way to deal with old bananas is of course banana bread. For portability muffins are a good way to go. Same mixture different mould and slightly less time in the oven. Lately I’m on a coconut buzz so instead of the usual walnuts there are coconut flakes in this recipe. To plump up the sultanas I soak them in my fav Bengal Spice tea but you can use regular or any other kind you like. These muffins (or buns if you want to make something a little more manageable sizewise) will keep for a few days in an airtight tin.
Banana and coconut muffins
You’ll need:
100gr butter room temperature
100gr moscovado sugar
150gr wholemeal flour
2 teaspoons baking powder
2 large eggs
2 teaspoon cinnamon
A pinch of allspice if you have it
A pinch of salt
250gr really ripe bananas
100gr flaked toasted coconut
100gr sultanas
Anything from an hour to 15 minutes before you begin put the sultanas into half a cup of tea in a pot. Bring to the boil then simmer until most of the water has evaporated. Allow to cool down while you get on with everything else.
Sieve the flour, cinnamon, allspice, baking powder and salt together and set aside. If the butter isn’t nice and soft stand it in the mixing bowl in a basin of hot water for a few minutes then cream it with the sugar til pale and fluffy. Add an egg and continue beating til fully incorporated. Add about half of the flour, beat then add the other egg, beat well then add the rest of the flour.

Mash up the bananas and beat them into the mixture then add in the sultanas followed by three-quarters of the coconut. . Mix well then spoon into moulds and top with the rest of the toasted coconut which goes deliciously chewy in the oven.

Bake at Gas Mark 5/190 degrees for 30 minutes. Enjoy!
Seasonal noodles with fresh corn, aubergine, tofu, coriander and lime in a coconut green curry broth
September 13, 2013

This dish is a current house favourite – It’s not just that the base notes never fail – coconut, lime ,coriander…… It’s the slurp factor – licensed! The kids will eat stuff in this dish that produce all kinds of agonies in other contexts.Aubergine? No problem! Scallions? Yay!!! It’s almost un-nerving…
I’m a huge fan of big warming Thai curries but during the summer it’s nice to lighten things up. Making a broth rather than a sauce keeps things lighter and keeping as many ingredients as possible uncooked really ups the freshness factor. In this dish the tofu is fresh – cut into tiny cubes so it soaks up the flavour of the broth. Not frying really cuts down on time and heaviness. Fresh sweetcorn is next – it’s so good now full of milky sweetness. As with anything remotely Thai I’ve added loads of fresh coriander and some sliced scallion greens.
There’s aubergine but no, that isn’t raw it’s pan-fried in super healthy coconut oil til it melts in the mouth. Delicious. When I was making this dish last night Lee had nearly snaffled half of it before I even got to put the dish together is how good it is.
I like to use rice noodles but I imagine that buckwheat will start to feel like an option when things start to turn colder. It’s really up to you..
Seasonal Noodles with fresh corn, aubergine, tofu, coriander and lime in a coconut green curry broth (for 4)
You’ll need:
For the broth:
1 bunch scallions (white parts sliced, green parts set aside for later)
1/2 teaspoon green curry paste (more if you like things really firey)
2 kaffir lime leaves
2 teasoons Nam Pla (fish sauce)
3 teaspoon soy sauce
Coconut oil
1/2 tin coconut milk
1 litre stock veg or chicken
3 carrots finely sliced diagonally

The rest:
1 Cob of Corn
1 Aubergine
1 slab tofu (pressed)
A decent sized bunch coriander
A couple of limes
Begin with the stock – finely slice the white part of the scallions and throw them in a wok or pot with some coconut oil and gently fry until soft and tender. Add the curry paste and fry for about 30 seconds before pouring in the coconut milk. Throw in the lime leaves, nam pla and soy sauce. Gently bring things to boil then add the stock and the carrots. Turn down the heat to a simmer.

Prepare the tofu and veggies while the stock is cooking – Slice the corn off the cob and set that aside. Wipe the aubergine then dice into pieces about the diameter of 10 cent coin. Heat some coconut oil on the pan and fry the aubergine until golden and tender adding more oil if necessary as you go. Take off the pan and drain on some kitchen paper when they are done.

While the aubergine is frying, stick on the kettle for the noodles and get them ready as per the instructions on the pack (I use the ones that require soaking rather than boiling). Chop the coriander and slice the green tops of about half of your scallions (save the rest for something else)
To put the dish together – divide the stock between four large bowls, add the noodles, top with tofu, sweetcorn and aubergine then finally scallions and and a heap of coriander. Yum!!!
Have a brilliant weekend,
Sarah
A recipe for this week’s blue potatoes
August 28, 2013

No, you aren’t seeing funny your potatoes really are blue! Well, purple actually. Deep purple. When you cook them they turn blue. I thought that apart from blueberries, blue food didn’t really exist except in Willy Wonka’s world. Turns out it’s very good for you – the blue part is a powerful antioxidant.
Over the weekend we boiled, mashed and fried them and here’s what we found…
Boiled and mashed – tasty but a lot of the colour leeches out and you’re left with a kind of grey. It’s a Farrow and Ball grey but that doesn’t really help at the dinner table……… To balance things out, I fried up some scallions in butter and stirred them through the mash and topped everything with cheddar and toasted the dish under the grill til golden which improved appearances a lot.
Fried – Way more successful colour-wise especially as I left the skin on so we got a 2 tone effect. These went down a storm with some fish on Friday evening then on Sunday I used some to flesh out a salad. I love fried things with salad and it’s perfect for late summer…
A Cashel Blue Salad with walnuts and a honey balsamic dressing topped with blue potato chips
You’ll need:
A small head of lettuce
A couple of scallions finely chopped
A handful walnuts
75gr Cashel Blue (or any other blue cheese salad your prefer)
1 small pear chopped
3 Salad blue potatoes scrubbed and and thinly sliced ( 1 1/2 mm thick)
Oil for frying
For the dressing:
4 tablespoons olive oil
1 1/2 balsamic vinegar
1 teaspoon runny honey
1 teaspoon whole-grain mustard
Salt and pepper
Heat the oil for oil for frying the potatoes in a pan then add the potatoes then fry over a medium heat til golden (about ten minutes). While the potatoes are frying, wash and dry the lettuce. Whisk the dressing ingredients together and set aside. Add the scallions, pear, walnuts and blue cheese to the lettuce.
When the potatoes are ready, take off the pan and drain on some paper. Dress the salad. Top with the fried potatoes and serve immediately. Enjoy x
Stuffed Crooksneck Squash with quinoa, caramelized fennel, walnuts and goat’s cheese
August 26, 2013

Hey there,
It’s that time when courgette fatigue starts to set in so I got to casting around for something different to fill our bags this week. Duncan Healy suggested a squash they’ve been growing which he reckoned were good for stuffing. They’re the Crooksneck variety so they look quite cool.

They have a lovely knobbliness on the outside plus the colour, as you can see, is pretty glorious….. As with all squashes you can eat the skin, which is of course packed with fibre, but you’ll need to par-bake without the filling first to get everything cooked to perfection. This procedure can be followed for pretty much any variety of squash and the stuffing is a movable feast so if you don’t have quinoa try brown rice or cous cous, instead of fennel a couple of good sized onions would do fine, pumpkin seeds will easily replace the walnuts and the goat’s cheese can be dismissed and replaced with feta. However…….. the combination below does work very nicely and the caramelized fennel leaves the filling lovely and moist and the lemon sounds a light summery note. The quinoa does its fluffy yet crunchy on top thing that I love and the goat’s cheese goes with everything as do the parsley and walnuts. Give it go – you can make it ahead of time as I did again today when I was doing some bread and reheat later, it doesn’t suffer for it.
Stuffed Crooksneck Squash with quinoa, caramelized fennel, walnuts and goat’s cheese
You’ll need:
1 Crooksneck Squash
1/2 cup quinoa
1 medium sized fennel
Olive oil
A handful walnuts
1 lemon
100gr crumbly goat’s cheese
A handful parsley
Well ahead of time (at least an hour or two) soak the quinoa in 3 times or more it’s volume of water. This gets rid of any bitterness and also makes it faster to cook and easier for your body to digest.

When you’re ready to start cooking, cut the squash in two, slicing length-ways down the side. Using a spoon remove the seeds from the centre leaving a nice dip for you to stuff. Rub each half with oil inside and out then rub the inside with a little salt. Place in a baking tray. Pour in 1/4 inch of water and place in a hot oven (Gas mark 5) for 30 minutes and get on with making your filling.
Trim and finely dice your fennel. Heat a generous glug of olive oil in a pan, add the fennel and gently sauté until golden and very tender. While the fennel is cooking, you can prepare the quinoa (if you have any leftovers in the fridge by all means bring them forward – you’ll need about 3/4 cup of the cooked stuff). Drain the quinoa and add 3/4 cup of fresh water and a pinch of salt. Bring to the boil, lower to a simmer and cook gently until all the water has evaporated and the grains are soft and fluffy. This should take about 5 mins. When this is done, take the pot off the heat, stir and set aside to cool.
Roughly chop the walnuts and more finely chop the parsley. Add these both to the quinoa. Stir in the fennel. Grate in about half of the lemon rind taking care to avoid the pith. Squeeze in the juice of about half the lemon. Crumble the goat’s cheese and add that to the mix along with plenty of freshly ground black pepper and a little salt.
When the squash is ready take it out of the oven and divide the stuffing between the 2 halves. Return to the oven and bake for a further 15 minutes.

Eat with a green salad – Marc Michel’s gorgeous lettuce or spinach and some toasted pumpkin seeds would be perfect. Lunch is served 🙂
Can’t find quinoa? We’ve got it and bring it with your veggies next week. Order here and this wonder grain(more amino acids than you can shake a stick at!) is yours.
Have a brilliant week,
Sarah
A salad of beet greens, goat’s cheese, peach and pesto topped with toasted sunflower seeds
August 9, 2013

High summer means basil and while sometimes our homegrown stuff doesn’t get enough sun to compete with its Italian cousins this year that’s not a problem – Yay!!! It’s hard to resist making pesto the first time I get basil each year(I hate the stuff in jars) so that’s what I did last night. To get over the pine-nuts costing more than gold problem, I used toasted sunflower seeds instead and they were just grand (and way more local as pine nuts usually seem to come from China which seems like a long way to me). Obviously pasta pesto makes a grand dinner in itself and it was hilarious watching not so baby (18 months already!!!!)Lee shoveling spaghetti into his mouth like a walrus last night but basil is a natural bedfellow for this season’s peaches so I couldn’t resist a salad as well.
I decided to use beet greens as a base and if you’re not familiar with these guys you’re in for a treat. You know the way beetroot is soooooooo good for you? Well, the leaves are actually better for you than the actual beets. Yes! But you have to get them fresh so use them today rather than than let them wilt as they will quite quickly. The colour is amazing – gorgeous ruby stems with dark green leaves so they make everything look fab. Throw them into any salad or juice as soon as you can – your body will thank you.

Back to our salad – I chopped up the leaves and stems pretty finely, tossed a handful of toasted sunflower seeds through them along with some goat’s cheese and chopped peach. The dressing was simple, olive oil and white wine vinegar (3:1) then a drizzle of honey over everything just before I served. Delicious.
Toasted sunflower seed pesto (this will make enough for the salad which serves 2 plus a decent size bowl of pasta for one)

You’ll need:
60gr basil
3 tablespoons sunflower seeds
2 cloves garlic roughly chopped
5 tablespoons olive oil
a generous pinch coarse salt
2 tablespoons Parmesan cheese
Begin by toasting the sunflower seeds till golden then set aside to cool down completely. Take the basil leaves off the stalks and put into a mortar along with the garlic, olive oil, salt and sunflower seeds. With a pestle pound to your desired consistency then stir in the cheese. Needless to say, normally I’d be using a hand blender for this sort of thing if I could but with this kind of quantity you don’t quite have enough to go electric so scale up if you can. Store in a jar under a layer of oil for up to 2 weeks (but it won’t last that long!)

A salad of Beet greens, peach, goat’s cheese and pesto and toasted sunflower seeds
You’ll need:
1 Bunch beet greens
1 ripe peach
120gr goat’s cheese
2 tablespoons sunflower seeds lightly toasted
Olive Oil
White wine vinegar
Honey
A generous dollop of pesto (as above)
Finely chop the beet greens and stems then wash and dry everything. Peel and chop your peach. Combine the seeds, greens, stems, and peach. Crumble in the cheese. Lightly dress with oil and vinegar. Top with the chopped peach and a generous dollop of pesto. Finally drizzle with a little honey and serve. Summer is served. 🙂
Have a brilliant weekend,
Sarah
High summer dining – Red Russian Kale and Aubergines
August 1, 2013

Hi there,
This week’s aubergines make great pastas. The trick is to cook them slowly so they sweeten up nicely and any bitterness dissipates. They end up achingly mellow and tender. Tomatoes are an obvious cohort and really you can’t go wrong with this combination. The sauce below takes a little time but it couldn’t be easier and you will be generously rewarded with a super moreish result especially if you track some basil leaves down and scatter over the finish dish for a final heady perfume. Yum yum yum!!!!!!!!!!!
I should also say, by the way, that this is stellar with any simple pan-fried fish or meat.
Aubergine and Basil Pasta
You’ll need:
2 medium small onions
1/2 head garlic
300gr aubergines (about what you have in this week’s bag)
1-2 tins tomatoes (this is a moveable feast. 1 will make enough for 2-3 people and 2 will feed up to 6)
Olive Oil
A handful of basil leaves
Roughly chop your onions and saute over a low heat in plenty of olive oil. Dice the aubergines add to the pan. Toss everything well adding more Olive Oil to stop things sticking. Keep things moving and when the aubergines start to soften and turn a golden brown you can throw in the garlic and a little more Oil if you think it needs it. Allow the garlic to completely soften then add the tomatoes, a generous pinch of sugar (takes away any bitterness that you might get from the tomatoes) and a pinch of salt. Lower the heat a little and cook for another 20 minutes (30 if you’re using 2 tins of tomatoes). Serve with the pasta of your choice and some Parmesan or Pecorino and some torn Basil leaves.

The gorgeous Red Russian Kale in your bags this week was grown for us by Mick Gordan and it’s absolutely packed full of nutrients. Have it steamed, stir-fried (with lots of garlic) or boiled. If you want to try something special, chorizo and kale are a match made in heaven and Nigella Lawson’s kale with chorizo topped with a poached egg is the perfect example. It’s lunch, dinner or tea in 10 minutes and it couldn’t be any moreish, a complete treat. The chorizo secretes its lovely spicy oil when gently fried and this is your sauce.You simply wash and shred your Kale, then slowly fry small slices of Chorizo in a teeny drop of oil for about 5 minutes releasing the oil. Poach an egg, toss the Kale with the chorizo in the pan then serve on a plate topped with the egg (runny yolk of course because adds lovely richness to the dish. Serve it straight up or with crusty bread.
In between the showers, this week’s peaches will be perfect on the barbecue – split them in half, barbecue then serve with some mascarpone whipped with cream and spiked with a little vanilla.
Have a brilliant long weekend,
Sarah
Something nice to eat in the garden this weekend
July 5, 2013

This is the kind of thing you might be served in the south of France in the summer and everything points to a south of France style weekend (woohoo!!!). It’s a cinch to throw together and all the ingredients are to hand and most of all it’s really tasty. Enjoy.
New Potatoes and french beans with pesto (for 2 as a main)
You’ll need:
1k New potatoes
150gr French beans
For the pesto:
A large handful basil with the tougher stalks removed
3-4 cloves garlic peeled and roughly chopped
3 tablespoons pinenuts
A generous pinch Maldon salt
3-4 tablespoons freshly grated Parmesan (vegans can skip this as I did recently and it tasted just as good)
A generous slug of your best olive oil
First of all wash your potatoes and drop them into boiling water. If there’s a variety of sizes start with the bigger ones then add the smaller ones after a few minutes so they’re ready at the same time. Top and tail the beans then steam for about 3-4 minutes. Be sure and keep them al dente. When they’re done rinse in cold water and set aside.
To make the pesto put blend the basil, oil, garlic and pinenuts with a handblender. Don’t make it too smooth, a bit of texture is nice. Finally stir in the cheese and salt. Taste and add more oil or salt as needed.
When the potatoes are ready, let them cool down a bit then roughly chop the larger ones and mix with the beans. Top with a dollop of pesto and lots of black pepper.
Have a brilliant weekend,
Sarah
A dish of Oliver Kelly’s Black Tuscan Kale with new potatoes, vine tomatoes and chorizo
June 28, 2013

With the years I find that rather than simply offering me produce more and more suppliers ask me what I want them to grow. What joy! The list is long and, and given our inclement climate, a little aspirational. Every year we try different things with varying degrees of success and slowly but surely the range of Irish organic varieties expands.
Kale is generally not a problem (although for some reason there was a national shortage this spring) but the coarse curly stuff has always left me non-plussed. It’s healthy. Sure. Actually it’s fantastically healthy – more antioxidants than you can shake a stick at. But it needs work to compensate for all that chewiness. I prefer its altogether more sophisticated (and just as healthy) cousin the Black Tuscan variety and our suppliers have been trying it out. Up first this year is Oliver Kelly’s.
It doesn’t disappoint. If you want to keep things simple toss it on the pan with some garlic and you’ve got a tasty side. Or, start with a couple of hunks of chorizo and top with a poached egg for the ultimate moreish yet pretty healthy supper. It can also be juiced but be warned – this is not for the faint hearted (although you can practically feel yourself getting younger as you drink it!).
This week’s recipe offers no such challenge -super- tasty and comforting it’s also easy peasy. Sautéed new potatoes tossed with a fiery mix of chorizo and sun-ripened tomatoes (it being summer and all) and wilted kale. It’s a dish that wouldn’t turn it’s nose up at a sprinkling of feta or a dollop of creme fraiche. You gotta balance out the juicing, right?
A dish of Oliver Kelly’s Black Tuscan Kale with new potatoes, vine tomatoes and chorizo
You’ll need:
500gr new potatoes
300gr tomatoes
A little chilli (as much as you like)
100gr chorizo, cut into half moons
4 fat cloves garlic
200gr black tuscan kale roughly shredded
olive oil
Maldon salt

Scrub the potatoes and cut them into large bite-size pieces. Bring to the boil then simmer til tender then drain. Heat some olive oil in a pan. Add the potatoes and saute over a medium heat til golden.
While the the potatoes are frying, heat a little olive oil in another pan. Add the garlic, toss for a minute then throw in the chorizo. After another couple of minute add the tomatoes and a pinch of Maldon. Toss everything over a brisk heat until the tomatoes have collapsed. Turn down the heat a little and let everything simmer for 2-3 minutes then turn the heat back up and throw in the kale. Allow the kale to wilt then turn off the heat.

At this stage the spuds should be done. Let these rest on some kitchen paper for a moment before mixing them with the tomatoes and kale. As I said a sprinkle of feta or a drizzle of creme fraiche or sour cream would be nice before you serve. Enjoy!!!
Easy ways with beetroot for the summer
June 25, 2013

I know I’ve been rubbish with recipes of late and I’m sorry. It’s just been a bit hectic. This week (at the eleventh hour as usual!!) I’m going to share 2 quickies that are perfect for summer snacks and lunches. Both are with beetroot that superfood that we all should eat so much of.
First up, a moreish beetroot hummus with toasted spices. It’s a recipe I found in that new Cook mag the Guardian on Saturday does. The colour is quite unbelievable (and definitely one of the best things about it – think Barbie on steroids). I’ll stick a photo on the blog later.
Beetroot Hummus with toasted spices and seeds
You’ll need:
250gr cooked beetroot, peeled
1 tin of chick peas -rinsed and drained with the skins removed
3 fat cloves garlic chopped
3 tablespoons tahini
Juice of 2 lemons
1 teaspoon ground coriander
A glug of olive oil
1 teaspoon sesame seeds
1 teaspoon cumin seeds

Lightly toast the sesame and cumin seeds on the pan then set aside. Put everything else in a blend then blast til you get the consistency you like. Drizzle with a little oil and top with the seeds.
Next up, a simple salad thrown together the other night with some chives and toasted sunflower seeds that proved a hit when we had it with quinoa and Asparagus, Moro kebabs, salted yogurt, baked feta, and mixed leaves and then again when I ate the remain with brown rice.

Beetroot salad with toasted sunflower seeds and chives with a honey balsamic dressing
You’ll need:
300gr beetroot (what you have in this week’s bag)
A handful of sunflower seeds
A small handful of chives
For the dressing
3 tablespoons olive oil
1 scant tablespoon balsamic vinegar
1 scant teaspoon whole-grain mustard
1 teaspoon honey
Cover the beetroot in water in a pot, bring to the boil then simmer til tender (this will take at least 30 minutes depending on the size). When they’re cooked drain and allow to cool down then peel.
Make the dressing by whisking all the ingredients together with a pinch of Maldon salt then set aside.
Toast the sunflower seeds on a pan til starting to change colour then leave to cool down. Dice the beetroot and toss with dressing. Add the sunflower seeds and finally chop the chives and throw those in.
Enjoy and have a brilliant week,
Sarah

We are well into asparagus season so I thought I’d share our favorite recipe this year as so many of you got asparagus this week. Like most of finer things in life simplicity is the way forward (I know I say this a lot but it is!!!).
A simple steaming, followed by a drizzle of olive oil or some butter, crushed Maldon…………… yum! Chop up your spears and toss them with pasta and Parmesan and a squirt of lemon for the ultimate in Italian refinement. Have them for breakfast week with eggs…….all they need is a creamy foil to really come alive.
I have a taste for the charred which I got years ago from a chef I worked with in Barcelona and I often cook my asparagus this way.

Use a griddle pan getting it nice and hot. Add the asparagus turning them when they char. This takes a minute or two depending how hot the pan is. When you have your snazzy stripes, add a little oil and some crushed Maldon salt and shake the pan vigorously. Turn down the heat a bit and cover for a minute and allow the asparagus to steam a little and cook a bit more which should get them nicely al dente.
After this, drizzle a little extra virgin olive oil and a spritz of lemon juice on them then some shavings of a nice hard cheese. Parmesan or Pecorino are obvious choices but a nicely matured Manchego also works really well. You don’t need loads just a little bit to add interest. As is it’s a picky starter to have while dinner is coming. This week’s recipe is what you do when you’ve got more people around and/or you want a proper starter. Serve the asparagus on a bed of Marc Michel’s amazing mixed leaves and add chopped walnuts and honey to the dressing. Simple but really gorgeous and well worth doing to showcase one of summer’s most popular varieties………….
A salad of char-grilled asparagus with aged Manchego on a bed of Wicklow leaves with a Walnut lemon dressing
You’ll need:
A bunch of asparagus
100gr mixed leaves – washed, dried and ready to go.
40gr aged Manchego (or Parmesan) shavings
For the dressing:
4 tablespoons olive oil
The juice of ½ lemon
A handful walnuts
A teaspoon of runny honey
Chop half the walnuts quite finely and the other half into small pieces and set aside for later.
Trim the tough ends of the asparagus – usually about an inch is more than enough. Heat a griddle pan. Add the asparagus and griddle until stripes appear then turn over and griddle on the other side. When both sides are done, add a little olive oil and a crushed Maldon to the pan and toss over the heat for a minute before turning down the heat and covering. Allow the asparagus to cook for another 2 minutes before removing them from the heat.

Make the dressing by whisking the olive oil with the lemon juice, honey and the more finely chopped nuts and a pinch of crushed Maldon. Lay the asparagus on the salad leaves and scatter the shaving of cheese on top.

Drizzle the dressing over this then add the remaining more coarsely chopped nuts. Serve with some crusty bread and sunshine 😉
Have a brilliant weekend,
Sarah

This week we have more of Mick Gordon’s brilliant spring onions. In our house they’ve been working their way into pretty much everything we eat for the past few weeks – buckwheat noodles with tofu, coriander and peanuts for lunch yesterday. Another noodle salad with prawns, tons of (Mick’s) spinach, coriander and a ponzu. rice wine vinegar and honey dressing a few nights earlier (no soy as we’d run out which I thought would be disaster but it turned out to be a blessing as it made everything fantastically fresh and summery). Then today’s lunch of avocado with Marc Michel’s lovely lettuce, some leftover fish and yet another impromptu ponzu, honey dressing.
All I can say is, play around, don’t waste anything. Every bit can be used. Chop the green bits into any salad or use as a garnish (remember the darker the colour the better it is for you) and the whites can be thrown into salads or minced into dressings. It goes without saying that a quiche or tart with these guys would be amazing. If you can’t bear the thought of dealing with pastry (or maybe I’m projecting) a fritatta is a good compromise as I suggested last week. Gruyere, goat’s cheese or a good cheddar are all good partners here……..
There are other ways to go……… our recent arctic temperatures had me looking for ways to get the oven on so I decided to roast up the onions and serve them with a sun-dried tomato and roasted hazelnut pesto. Yummmmmmmmmm! The pesto is beyond moreish and a cinch to make. Make a double quantity and keep in the fridge for sambos and dips. We brought a tub to Africa day yesterday and it kept everyone big and small happy.
After about 30 minutes in a hot oven the onions wilt to a soft, sweet luscious mess which is offset beautifully by the slightly spikey pesto. Serve with bread or wedges of polenta. Add some goat’s cheese and a green salad and you’ve got lunch or a light supper for two sorted.
Roasted Spring Onions with Sun-dried Tomato and toasted hazelnut pesto
You’ll need:
1 bunch spring onions

For the pesto
A handful toasted hazelnuts
2 tablespoons sun-dried tomatoes
4 tablespoons olive oil
1 small handful parsley
1 clove garlic
A pinch of Maldon salt
Give the onions a clean then put on a baking tray, cover, drizzle with olive oil and place in a hot oven to roast for half an hour.
To make the pesto, roughly chop the garlic then blast with the other ingredients to a rough paste

When the onions are ready, serve alongside the pesto with plenty of napkins for all the drips!
Have a brilliant week,
Sarah
Beautiful Greens
May 17, 2013
Hey, How’s it going? We’re pretty busy with our new Summer Healthy Eating Programme detox and the longer days are definitely coming in handy but you couldn’t call it summer. This afternoon’s been lovely though…..
Vegwise, we’re still in the middle of what’s called the “hungry gap” here in Ireland. It’s the time just before all the summer varieties really kick in. The winter varieties are well and truly finished and there’s a slow trickle of new varieties starting to come through. We’ve already those gorgeous salad greens from Marc Michel and Denis Healy, amazing coriander from Mick Gordon last week and this week Mick brought us his fab spring onions.
Now the only question is what to do with them – champ? pad thai? fresh in salads? Slow roasted? Maybe dipped in romanesco (The Natural Sauce Company based here in Dublin do a great one) . Last night I made a lovely fritatta with the bulbs which I gently sautéed in butter. 20 minutes will get them gorgeously melting then some of your favourite cheese (I used a Pecorino but it’s up to you). With the bunch in this week’s bag you could use 6 eggs for the fritatta and feed up to 5 people. Add some spuds and you’d feed 8. Depends on how many come to dinner…. Also fritatta keeps well (but outside the fridge as cold does something strange to it) and makes fab sambos so you can never make enough in my book.
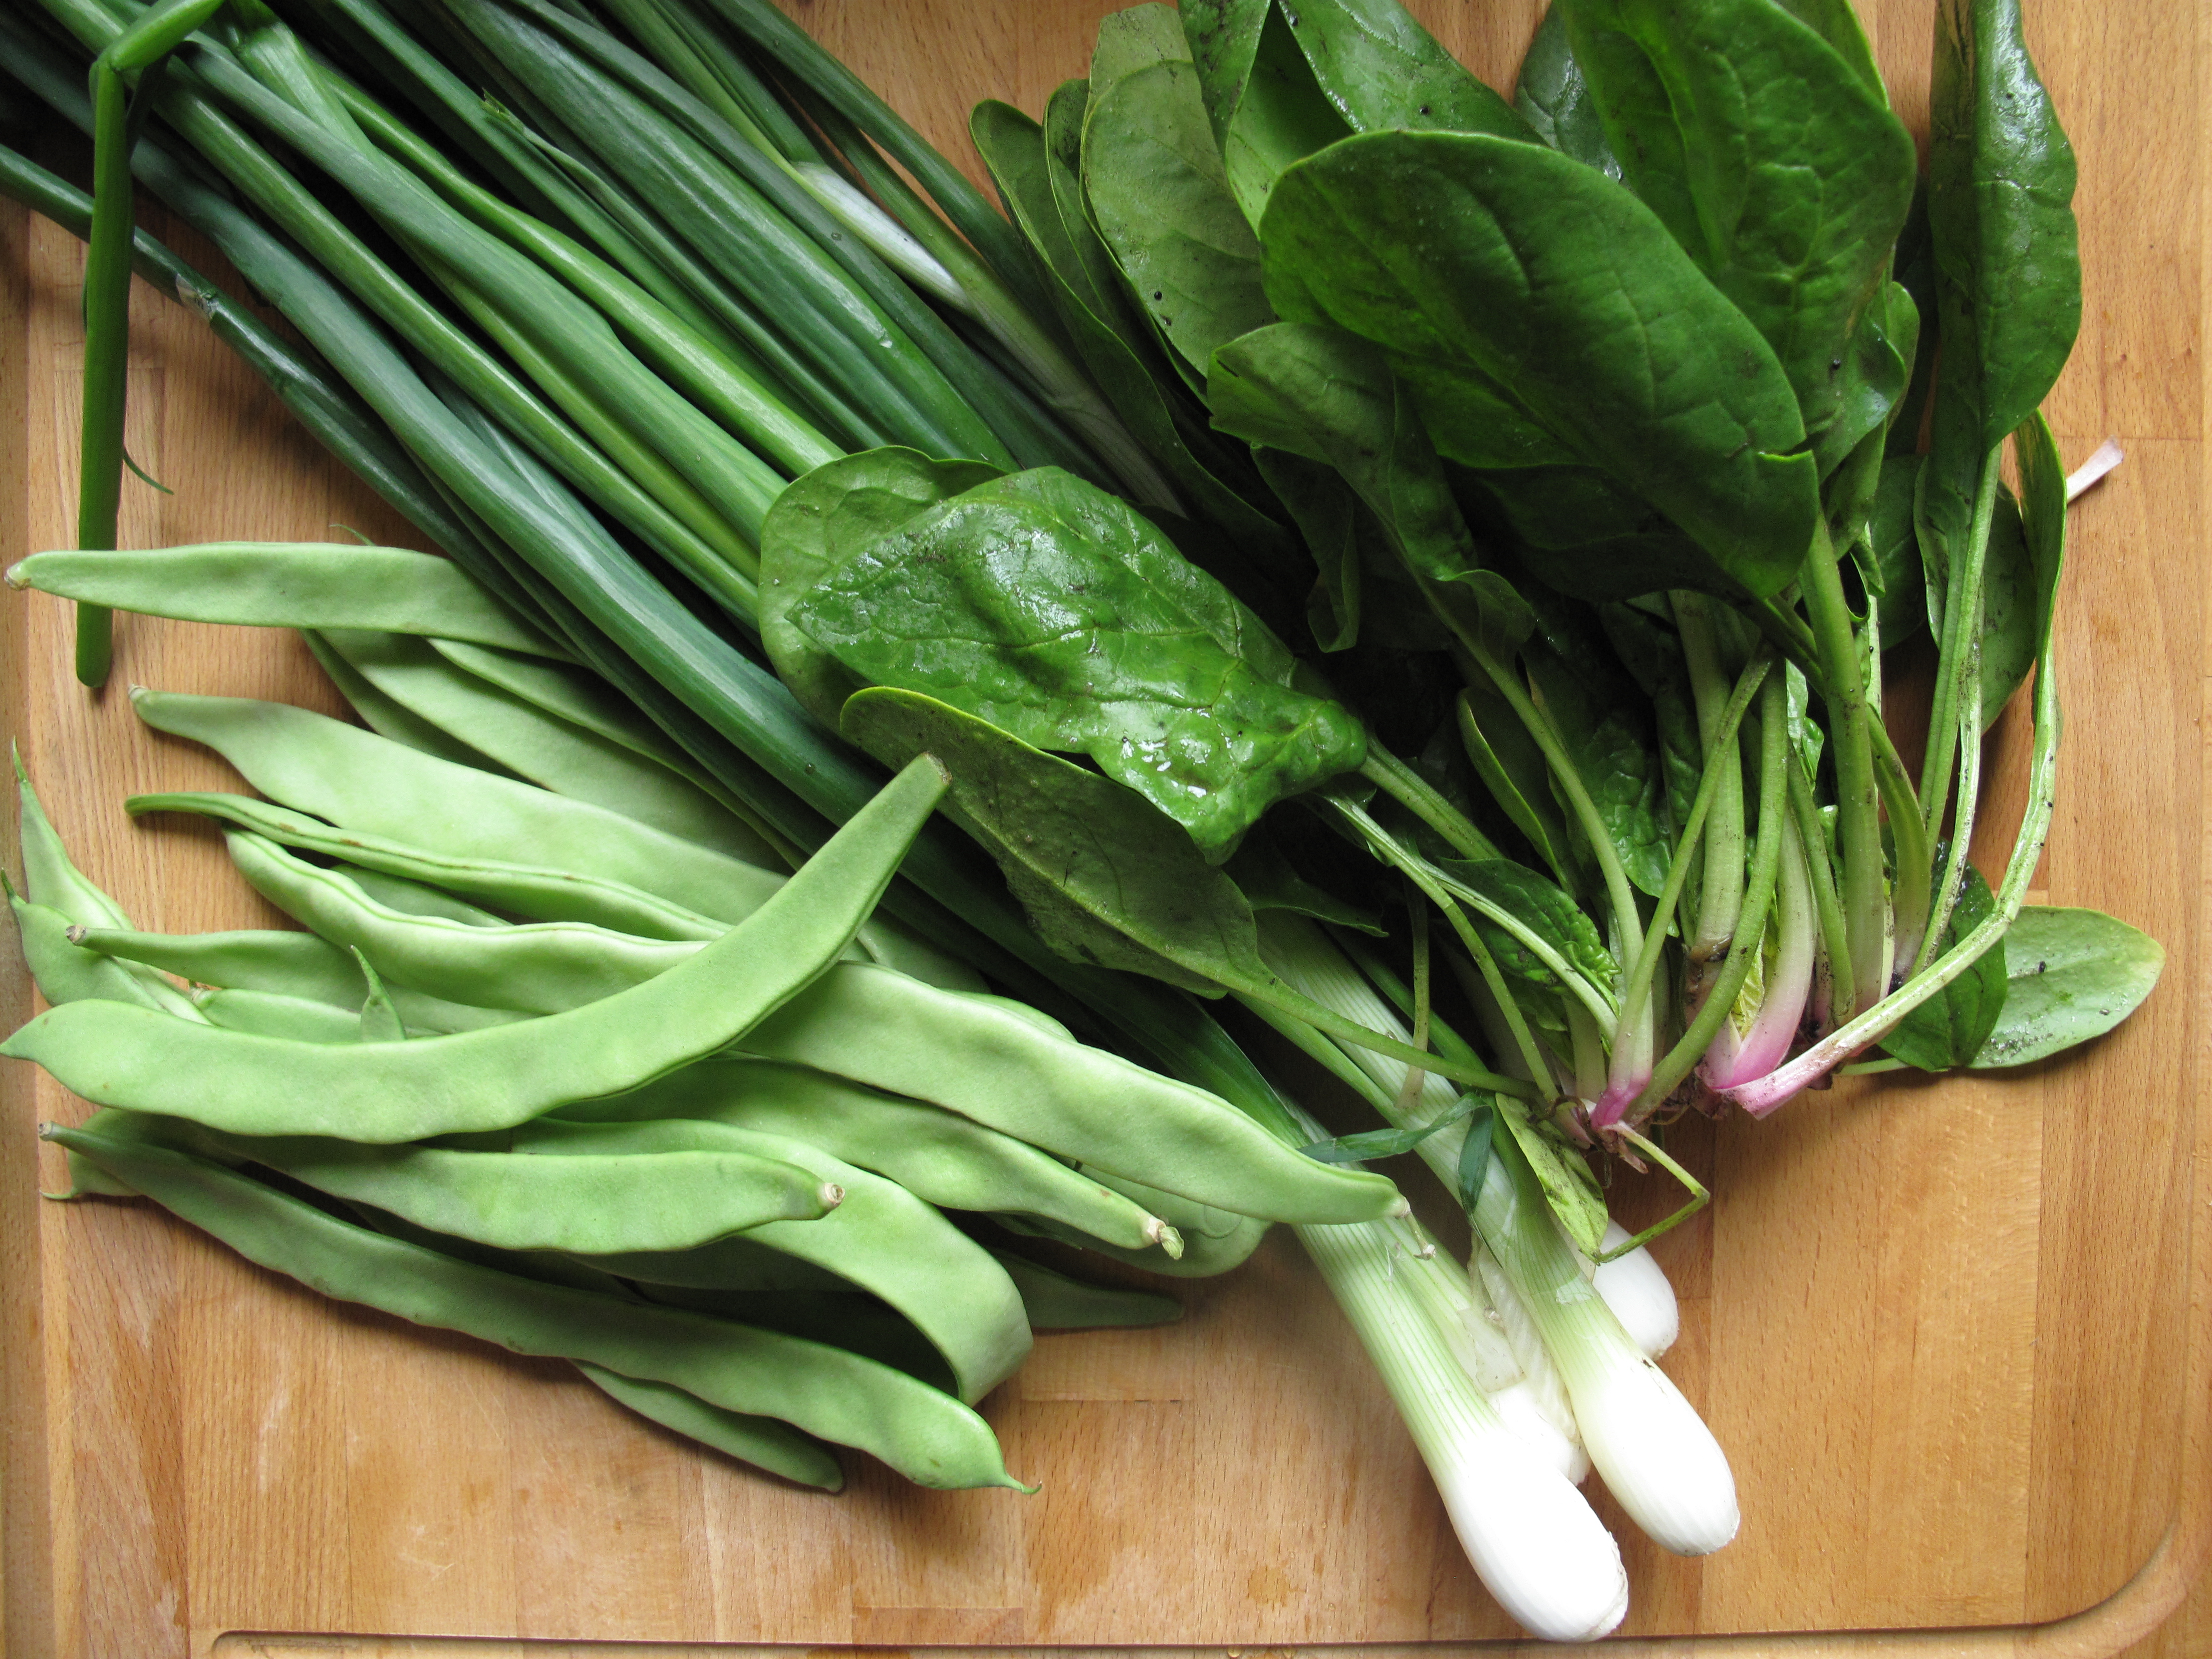
I used the rest of the onions i.e. the green stems to make a salad along with this week’s beautiful spinach and flat beans. Tempted as I was to toss those beans with chorizo after a light steaming they were so spanking fresh that it seemed a shame to waste their lovely nutiness so I used them raw for this salad and was very glad I did.
I’ve been playing around with nut dressings of late – roughly grinding them, then adding them to dressings so you end up with a paste more than a dressing. It’s great, really adds lots of crunch and flavour, aswell as all the amazing goodness that nuts and seeds have to offer. For this dressing I toasted sunflower seeds then stirred them into olive oil and lemon juice. To counteract any bite from the onions I added a little honey. Yum Yum. The whole thing works so well with the fritatta but try it with any veggie main, we’re addicted – Walnuts in a dressing for asparagus in particular is a match made in heaven.

The Salad Recipe (if you can call it that)
A couple of handfuls of spinach or any greens you like
A handful of flat beans topped and tailed then cut at an angle
A couple of spring onions (green part only)
For the dressing:
A handful sunflower seeds
Your best olive oil
1 Lemon
Runny honey
Prepare the dressing by toasting the sunflower seeds on a dry pan til just starting to change colour. Allow to cool slightly then grind in your blender to a coarse texture – a few bits don’t matter at all and you definitely don’t want anything powdery.
Combine about 5 tablespoons olive oil with the juice of a lemon adding a pinch of Maldon salt and a scant teaspoon of honey. Stir in the sunflower seeds and mix to a paste. If things seem too thick add a little more oil. You want the consistency of a good pesto.
To put the salad together, toss the spinach with the beans and onions. Spoon the dressing on top along with a scattering of seeds. Serve with ……..anything!
Have a brilliant weekend,
Sarah
A salad of mixed Wicklow leaves, goat’s cheese and toasted pumpkin seeds topped with crispy fennel
April 19, 2013

I had deep-fried crispy fennel in a salad recently in The Damson Diner and it was a revelation. A whole new way to approach fennel! I couldn’t believe I hadn’t of it before………
In general I’m a big fan of the contrast of salad against crispy veg. Those of you with artichokes this week can enjoy the simple pleasure of slicing the hearts, coating them in egg and breadcrumbs then frying them til golden. Delicious. With lemon juice this is beer food par excellence (never hurts to set the bar high) but on a bed of leaves dressed in lemon juice and a scant drizzle of your finest olive oil you have a gorgeous first course. Add some parma ham, or a fine sheep’s cheese and it’s a lunch. Yum!
Back to the fennel. It’s the same principal really. Marc’s gorgeous leaves balance the crispiness of the fennel. Some toasted pumpkin seeds and crumbled goat’s cheese complete the dish. Then it’s a dressing of olive oil and lemon plus a generous drizzle of pomegranate molasses. To add some extra interest I added a little hot smoked paprika to the flour I dredged the fennel in. This creates a nice smokiness which finishes things off nicely.
A salad of mixed Wicklow leaves, goat’s cheese and toasted pumpkin seeds topped with crispy fennel and hot smoked paprika (for 2)
You’ll need:
2 handful of mixed leaves (or any other leaves you like)
1 medium fennel bulb
120gr soft goat’s cheese
A handful pumpkin seeds
2 tablepoon self raising flour
1 level teaspoon hot smoked paprika
Vegetable oil for frying
Olive Oil
The juice of 1 lemon
Pomegranate molasses
Wash and dry the salad leaves and set aside. Toast the pumpkin seeds and them aside aswell. Trim the fennel, then, using either a mandolin or a very sharp knife, slice it finely (the thickness of a credit card would be about right). Mix the flour with the paprika along with a pinch of fine salt. Dredge the fennel in the flour taking care to dust off any excess. Heat about 2 cm oil in a pan and when hot but not smoking, add the fennel and fry til golden. This should take about 2 minutes so if the fennel starts changing really colour quickly turn down the heat a little.
To finish the salad, toss the leaves with the seeds. Crumble in the goat’s cheese. Dress with olive oil and the juice of half a lemon. Taste and add more lemon if needed. Drizzle with some pomegranate molasses then top with the crispy fennel.
Serve immediately.

This week’s broad beans and lettuce are the kind of varieties that say Spring to me. To celebrate the end of the hibernation period I’ve been getting back into salads in a big way. I usually take broad beans in a Mediterranean direction – cous cous, feta, chorizo, mint, tomatoes…….. but for lunch yesterday I tried something different.
Armed with my new favorite condiment Ponzu, a tangy citrus sauce (think lemon cut with a hint of orange) popular in Japanese cuisine, I made a light dressing with sesame oil and soy. You’ll get this in the Asian market and some delis and if you don’t track it down straight up lime or lemon juice will also work. To balance out the tart citrus hit you get from the Ponzu I added honey for sweetness. Lettuce and broad beans were the salad’s backbone and to this I added arame seaweed, another Japanese staple which is an amazing source of calcium, iodin, magnesium and Vitamin A. Toasted sesame seeds added crunch and even more flavour and that was all that was needed. The seaweed needs soaking – about 10 minutes but you can have that happening while you get everything else ready.
The result is moreish and super healthy to boot. This recipe feeds two and with a bowl of short grain brown rice on the side you have a lunch that will fill you up yet leave you feeling light 🙂
Spring salad with Broad beans dressed with ponzu, honey and toasted sesame topped with arame

You’ll need:
500gr broad beans podded
1 lettuce (or 2 large handfuls of whatever salad leaves you fancy)
2 heaped tablespoons dried arame seaweed
2 heaped tablesspoons sesame seeds
The dressing

3 tablespoons blended sesame oil
2 tablespoons ponzu or lime juice
2 tablespoons soy sauce
2 teaspoon runny honey
Beginning by putting the arame in a bowl of water. Steam the broad beans until tender then set them aside to cool while you get on with your dressing. Make the dressing by whisking all of the ingredients together. Set aside.
Toast your sesame seeds on a pan and set aside.
Wash and dry the lettuce and tear into bitesize pieces.
Pop the broadbeans out of their skins and toss them with the lettuce. Drain the seaweed and cut the fronds in half and toss them in. Add the sesame seeds reserving some for the top. Add the dressing and toss the salad taking care not to damage the leaves. Serve with a scattering of sesame seeds. Eat immediately.
For a heavier meal this salad would work brilliantly with some fish or a bowl of tofu.
Have a great weekend,
Sarah
A warming carrot and ginger soup
March 22, 2013

Who’s going out this weekend? Yeah, thought as much. With this weather we’ll all be staying as close to base as possible. What’s for dinner? I’ve made a pot of soup with this week’s carrots. It’s got plenty of ginger and garlic which not only add flavour but also give a much needed immunity boost (changes in weather confuse things in your body and make you more prone to picking up bugs). Make this, build a fire, stick on a movie and hope all this weather abates soon….
A warming carrot and ginger soup
You’ll need:
2 medium onions roughly chopped
Olive oil
3-4 fat cloves garlic chopped
600gr carrots washed and scrubbed
1 piece ginger the size of a 2 euro piece peeled and grated
1/2 cup red lentils
1 litre vegetable stock (as usual I use Marigold)
Salt and Pepper
Begin by soaking the lentils in water. Set aside. Heat a glug of olive oil in a pot over a medium heat.

Throw in the onions and saute til soft and golden. Add the garlic and fry until soft then throw in the ginger.
While the garlic and ginger are cooking slice the carrots and add them to the pot. Toss everything then add the stock. Season with salt and pepper. Rinse the lentils under plenty of cold running water and add them too.

Bring everything to the boil then reduce to a gentle simmer and cook for about 30 minutes until everything is tender. Take off the heat and blend until smooth. Serve topped with either chopped parsley or yogurt and toasted seeds.
Stay warm x
A spring salad of Broad beans, white cabbage and toasted pumpkin seeds with a yogurt and maple dressing
March 4, 2013

It’s the first week of March and the weather is already sunnier and warmer. Yay! It’s a rare alignment of dates and weather. Shouldn’t get too excited – it’ll probably be snowing by the end of the week. We have broad beans in this week, a preview of summer to come. You can of course steam then toss them with garlic and chili and stir through pasta for a super quick meal. Go one calorie- tastic step further and sauté them with pancetta and stir in cream, pasta and plenty of pasta for absolute heaven on a plate.
As it’s nearly summer 😉 I made a salad with this week’s white cabbage. It’s a sort of coleslaw I suppose. I shredded the cabbage finely and mixed it with a few finely diced carrots – half and half roughly. Steam the beans and toast the same volume of pumpkin seeds. The dressing is yogurt based and instead of honey for sweetness I used maple syrup which makes a nice change. This quantity makes enough for 2 or 3 people to have as a side with say, fish or as part of a larger picky type meal.
A salad of Broad beans, white cabbage and toasted pumpkin seeds with a yogurt and maple dressing
You’ll need:
Half head white cabbage shredded finely and chopped
2-3 large carrots diced finely
500gr broad beans podded
100gr pumpkin seeds
For the dressing
2 tablespoon yogurt
2 tablespoons olive oil
1 tablespoon cider vinegar
1 teaspoon wholegrain mustard
1 tablespoon maple syrup
Pinch salt
Black pepper
First of all make the dressing – whisk all the ingredients together. Check and correct the seasoning if necessary then set aside.
Pod the beans then steam until tender. Allow to cool then pop each bean out of its pod.
Toast the pumpkin seeds by placing with on a frying pan and toasting over a medium heat til they change colour.
To put the salad together. Toss the cabbage and carrot into a serving bowl. Top with the beans and pumpkin seeds. Drizzle with a little of the dressing and serve the rest on the side.
A fennel,blood orange and chorizo stew
February 26, 2013

Hi there,
It’s been a while and I’m sorry. We’ve been very busy and despite great plans each week to write recipe I just haven’t been able to get near the job. Sometimes I haven’t even cooked that much. Paul has fed me random things (I even ate dahl from a plastic bag I’d previously poured scorn on and was grateful) when I arrive home late at night.
Home Organics is growing and it’s been all hands on deck. As exciting as it’s been, I’ve missed my kitchen. I made this week’s dish the other day and it’s everything I love in a winter dinner – gutsy and warming. A drizzle of leftover creme fraiche which I had in the fridge made it and because I’m greedy, I sheved a little Parmesan on aswell – yum!!!
It’s a cinch to make with very little chopping or at least little enough for me to be able to play chasing with Lee (now 1!!) who has morphed into a speedy bug able to go from the kitchen to the top of the house in jig time. Yes, hanging out in the kitchen rocks 🙂
Fennel, blood orange and chorizo stew

You’ll need:
500gr fennel trimmed and diced into pieces about the size of 2 euro coins
200gr chorizo thinly sliced
1 blood orange
2 tins chopped tomatoes
Sugar
Salt and pepper
1k spuds peeled and chopped into large bite-sized pieces
To garnish: Creme fraiche and/or Parmesan shavings and some chopped chives
Begin by heating some olive oil in a deep pan. Add the fennel then fry over a lowish heat until nicely golden. This will take about 20 minutes or so. Add the chorizo and fry everything until it has released all its lovely oil.

Add the juice of the blood orange and cook for a minute then add the 2 tins of tomatoes and pinches of sugar and salt. Throw in the spuds.
Cover and then over a medium heat let the spuds cook and tomatoes cook down and reduce by about a half. When the potatoes are tender, check the seasoning adding as much black pepper as you want.
Serve topped with a dollop of creme fraiche, some Parmesan shavings and some chopped chives. A salad of this week’s spinach and some toasted pumpkin seeds would make a perfect side.
As you can imagine, this tastes fantastic the next day.
Enjoy xx
A soup for every day
January 28, 2013

This is the soup we eat right through the winter. It’s very tasty, easy to make, nutritiuous, you can make vast quantites of it to freeze or stash in the fridge and very importantly it’s super, supercheap. So what goes into this wonder lunch/dinner/snack? Well, pretty much anything, especially the kind of stuff that’s in season at the moment (leeks, onions and roots… lots and lots of roots) The base is red lentils which take the same time to cook as most root veg (20mins) and then it’s whatever’s in the fridge really. Before you leap here’s a few ground rules
First stage
Start by gently frying your onions or leeks when they’re soft you add lots of garlic and some chilli . A bay leaf in the pot is also very good at this stage.
If you’ve got a pepper or some fennel they can go in with the onions as it’s good to cook these guys until they’re really, really tender and this won’t happen if you add them later.
Next step
The spices also go in here and these, my friends,are up to you. Some quick ideas that will never fail you are:
- cumin seeds and/or cracked coriander seeds
- any curry masala you like will work
- your basic fresh chilli and ginger mix is always good and perfect for warding off colds and flus right now
- A spoonful of thai curry pastes are a great quick fix and nicely followed up with some coconut milk when you add stock and lime juice when you serve
Let these cook for a minute or two (especially the chill and ginger) and add any mix you fancy of the following:
Sweet Potatoes
Butternut
Turnip
Carrots
Jerusalem Artichokes
Celeriac
spuds
Cauliflower
To this then add well rinsed red lentils. As a rule of thumb the ratio I use is for every 4 cups of veg I add a cup of lentils. Finally add stock – about a litre (Marigold usually) for every 5 cups of veg and lentils (ie 4 veg + 1 lentils) . Bring to the boil then reduce to a simmer and leave for about 20 minutes.
Finished
When everything is tender,blast with your blender til smooth. Serve topped with yogurt and toasted pumpkin or sunflower seeds or drizzle with chilli oil or lime juice – whatever you like. Feel warmer immediately !!
Apologies for being so remiss on the recipe front of late – we’ve been very busy with the 8 week Healthy Eating Programme. Now that we’ve got everything up and running and things are a bit more settled I’ll be resuming normal service.
Have a great weekend,
Sarah
Cranberry and Cinnamon almond Tart
December 21, 2012
I can’t say that I get that excited by cranberry sauce. The sweet note on my Christmas dinner plate comes from my spiced red cabbage with apple which I firmly believe pulls any roast dinner together like nothing else. I’m a recent convert so I’m especially evangelical.
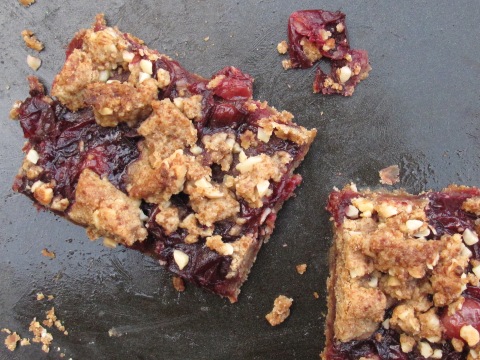
At the moment there isn’t an organic cranberry to be had but years ago they used to be more plentiful and I was always left with a stockpile which I slung (if that’s the word) in the freezer. Like all berries they freeze really well but unlike all berries I hadn’t a clue what to do with them so I came up with this tart. It turned out to be a winner – a shortbread almondy base topped with a jammy cranberry layer spiked with a little cinnamon and orange followed by a crumbly topping with almond nibs. It’s a riff on that mango and coconut one I blogged earlier this year after Lee was born. It’s best warm with some softly whipped (but hey, what dessert isn’t?) but it’s also great for eating straight up on the hoof with cups of tea and coffee as you go about your business over the next few days. And if you’re having one of those mornings where dessert for breakfast (without the cream)seems pretty right as we were last Sunday it’s not the worst choice either…..
This is, by the way a fantastic gluten free desert and I often make it with rice flour. Another thing I like is using coconut palm sugar instead of regular moscovado. This stuff is amazing and gives things a gorgeous butterscotch twist plus it’s way better for you. It can be tricky to track down so moscovado will work fine. I plan to start stocking it in the new year and I’ll keep you posted when it comes in.
Cranberry and Cinnamon Almond Tart
You’ll need:
400gr cranberries
1 orange
8 heaped tablespoons coconut palm sugar – if you’re using regular brown or moscovado I’d use less so 6 should do it.
1 cinnamon stick
1 teasoon ground cinnamom
250gr regular white or rice flour
140gr ground almonds
230gr butter
250gr coconut palm or moscovado sugar
pinch of salt
2 handfuls almond nibs

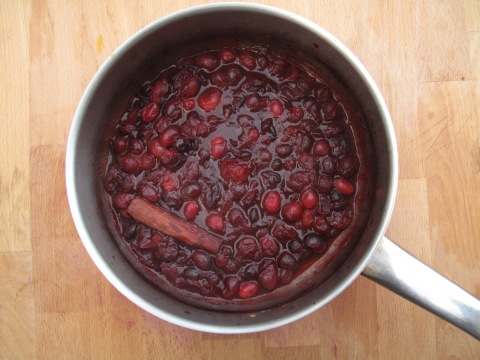
Begin with the cranberries – sort through them, picking out any bad ones then rinse and put in a pot with ¾ cup of water, the juice of the orange, the cinnamon and the sugar. Place on a moderate heat. Stirring occasionally, allow the berries to pop and the sugar to dissolve. When most of the berries have popped and the mixture has started to thicken you can turn off the heat. This will take about 5 minutes.
To make the shortbread base and crumble topping, put all the ingredients bar the almond nibs into a bowl and crumble the ingredients with your fingers tips until you have something resembling fine breadcrumbs.
When this is done, reserve about 2 large handfuls and press the rest into a greased baking tray (10 x 14 inches or 25 x 35 cm).
Bake this the at gas mark 5 oven for 15 minutes then top with the cranberries. Take the remaining crumble mix and adding the nibs form small clumps with your finger tips and spread these on top of the cranberries. Return to the oven and bake until golden (about 15-20 minutes).
Serve warm with cream or ice-cream.
Have a brilliant Christmas and a very happy new year,
Sarah
So, with just a week to go I thought it would be good to get in some sprout practice. I needed some anyway. It’s been a while and I’d forgotten how good they are. So there’s the traditional Irish approach – boil ’em up for say, 20 minutes, 40 some would argue, til they’re nice and soggy. Then, leave in the oven for about 45 minutes, or cool then microwave for 2 – 5 mins.
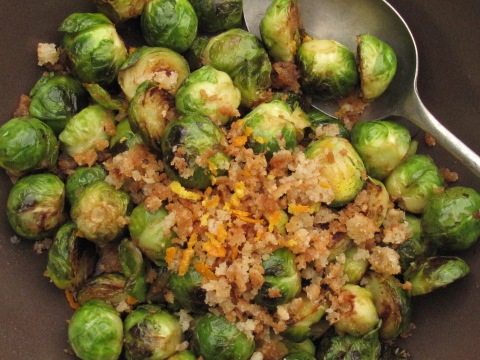
It’s tempting I know but I’m going to propose something a little different. Lightly steamed then tossed in a very hot pan til beginning to blacken then spritzed with orange juice and a dash of balsamic and finally, topped with crispy breadcrumbs. Very delicious and, ready in under 10 minutes.
Pan-fried Brussels sprouts with orange and a dash of Balsamic with crispy breadcrumbs
You’ll need:
400gr brussels sprouts
olive oil
1/2 orange
Balsamic vinegar
A handful breadcrumbs
Wash and prepare the sprouts. If they are big, cut them in half but if they’re small leave them as they are. Steam them for about 2 minutes until they are barely al dente. Heat a generous dash of olive oil in a large pan and when it is hot throw in the sprouts and toss until they have started to blacken on all sides.
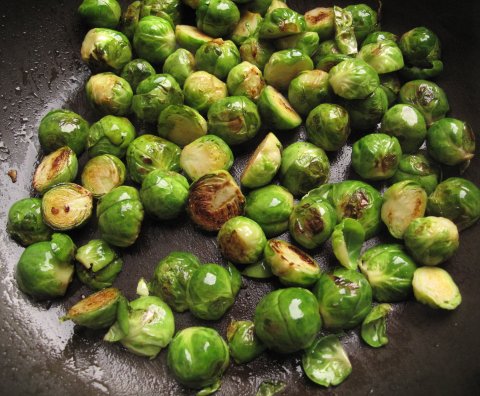
Squeeze the juice of the half orange into the pan and continue tossing until it has been absorbed. Add salt and pepper then turn off the heat. Heat some olive oil in another pan and add the breadcrumbs and fry until golden. Top the sprouts with the breadcrumbs and serve.
Have a great week,
Sarah
Fennel – proceed with care but do proceed!!!
December 10, 2012

Fennel tends not to feature on most people’s top ten veg list. Even though it grows quite happily for us in Ireland we don’t have any tradition of cooking it so most people draw a blank (it’s famed anise aroma means it’s not the kind of veg you can throw into anything). It’s a shame because it has lots to offer.
Nutritionwise, it’s got high levels of potassium which is very good for your heart as well as a good mix of minerals like copper, iron, calcium, magnesium, manganese, zinc, and selenium, vitamins like C and B-6 and folic acid, essential oils anethol, estragole, and fenchone (fenchyl acetate). anethol is especially useful as it has been found to have anti-fungal and anti-bacterial properties. Phew!! Not bad for something that only has 31 calories per 100gr.
In the kitchen it is delicate and sweet and has that beautiful anise aroma which is brilliant for waking things up on the dinner plate especially at this time of year when the temptation to eat lots of heavy comforting food really takes over. It’s great for balancing those heavier wintery dishes – try the classic and oh so simple salad of shaved fennel with Parmesan, lemon and olive oil with baked potatoes for an easy supper that comforts but also leaves you able to walk around afterwards. Or how about a slab of chilli baked feta with a salad with this week’s red cabbage, some perfectly ripe Hass avocado, finely chopped fennel, toasted seeds and a smattering of chopped coriander? That’s tomorrow’s lunch sorted….
I think the trick with fennel is to cook it a lot or not at all. There aren’t half measures. Long slow(ish) cook renders it tender and sweet with a melt in the mouth consistency. That’s why I favour the oven. Favourite approaches are quartered or sliced with butter and lemon or for the last word in moreish try it finely sliced and layered with Parmesan and sour cream, topped with bread crumbs and baked til crispy and golden. Yum!!
Of course there isn’t always the time for that kind of cooking. Slicing it finely will get around that. For this a mandolin is your best friend. I got mine a few years ago in Arnotts and haven’t looked back. I love it!!!! In a mere 2 or 3 minutes a large bulb is reduced to a pile of wafer thin layers. A whole new level of precision. A lot of patience and a very sharp knife will do the same thing but that’s never been my strong point ….
With the fennel shaved it cooks to sweet perfection in about the same time it takes to boil pasta making it perfect for a quick dinner or supper. I pan-fry it with a little chilli til it was crispy round the edges then tossed it with toasted pine nuts, crumbled feta and a spritz of lemon juice. Very delicious but a cinch to make this dish will set you up perfectly for an evening of pre-Christmas pints. Enjoy!
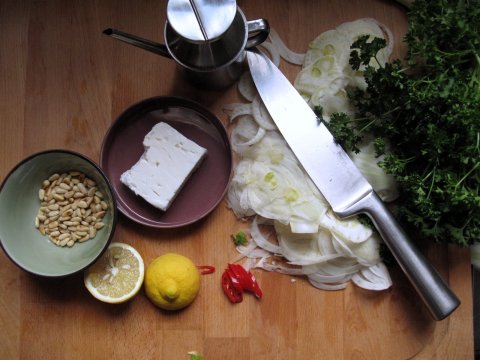
Pasta with fennel, toasted pine nuts, feta and lemon
You’ll need:
1 bulb fennel (about 350gr)
1/2 fresh red chilli finely chopped
A handful pine nuts
100gr feta
1/2 lemon
olive oil
Pasta
Put on the kettle for the pasta then shave the fennel with a mandolin or knife to the thickness of a business or loyalty card (roughly 1/2 mm). Heat some olive oil on the pan and add the fennel and chilli. Put on the pasta and heat another pan to toast the pine nuts. Add the nuts to the pan and toast until stating to turn golden then take off the heat and cool down when. Remember to keep tossing the fennel so it cooks evenly and you can also add a generous pinch of crushed Maldon. When the pasta is done, drain it and set aside. The fennel should be ready at this stage – nice and soft and turning brown and crispy round the edges. Add the pasta to the fennel along with the pine nuts. Mix well adding a little more if you think it needs it. Now add the juice of the half lemon, the feta crumbled, lots of black pepper and the parsley. Mix again and serve immediately. Enjoy x
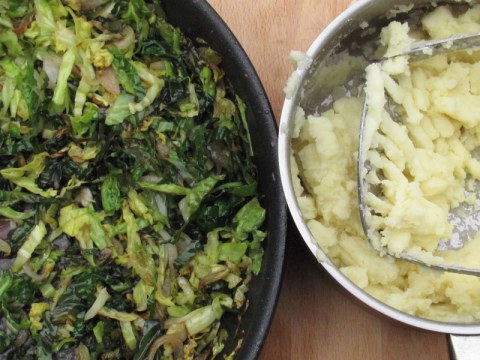
Not the colcannon your granny used to make
November 29, 2012
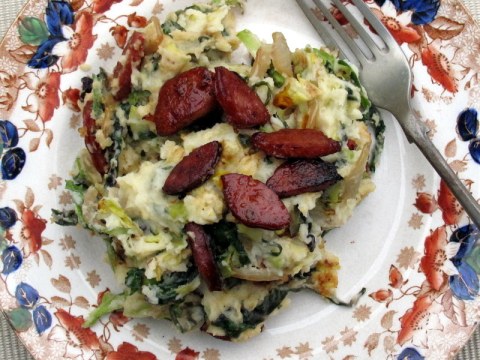
It’s freezing. It’s been raining. The time for mashed potato is upon us. Am I right? I am. Yeah, my kids and husband will gladly hoover up epic amounts of cous cous and quinoa during the rest of the year but when we get to this kind of deep winter it’s mash that really gets them excited. My mother, who has no truck with my weird grains (“but cous cous isn’t really food is it?……….and what’s quinoa?????????!”) likes to give me knowing glances as they lorry into a third portion of shepherd’s pie.
Last week’s cabbage and spuds said colcannon to me from the start ( jeans can stretch!) and as it was a week night I wanted to keep things really simple and just make one dish. Adding some smoked Gubbeen chorizo (you can get it in Sheridan’s and it’s well worth tracking down if you’re round town) not only takes an Irish classic to a whole new level it makes a meal out of this humble dish. If you want to go further, this version will make a simple piece of grilled fish sing. A side of broccoli or romanesco lightly steamed then tossed in garlic and chilli and you’ll be practically taking things to dinner party level…..
Colcannon with smoked Gubbeen chorizo
You’ll need:
600gr potatoes
250 gr cabbage washed and finely shredded
1 large onion finely sliced
Milk
Olive oil
Butter
150gr chorizo (smoked Gubbeen if you can get it), sliced finely and cut into half moons.
Peel the spuds and cook in boiling salted water until tender. While the potatoes are cooking heat a large knob of butter on the pan with a drizzle of olive oil. Sauté the onion gently until soft and caramelized. Throw in the cabbage and fry until wilted.
When the spuds are cooked, drain then mash til super creamy with a generous knob of butter and a dash of milk. Season well with salt and lots of freshly ground black pepper. Heat a little oil in a pan, throw in the chorizo and fry until crispy. To finish off, stir the onions, cabbage and half the chorizo into mash. Top with the remaining chorizo and serve.
Enjoy x
Roast Sweet Potato burritos with chargrilled tomatillo salsa and Knockdrinna cheese
November 19, 2012

Now this is something you don’t expect when we talk about local seasonal eating in Ireland. Tomatillos. Usually found in (good) Mexican food, these guys are also called tomates verdes (green tomatoes) and they make rather brilliant salsa. There’s very little chopping involved it’s just all the tomatillos in this week’s delivery (250gr) peeled of their papery husks cut in two and tossed into the blender with a couple of cloves of garlic and 1/2 chilli (the whole one if you like things really hot), a pinch of salt. Blast til you have a coarse puree then add half an onion finely chopped, a handful chopped coriander and the juice of half a lime. Taste and add more lime or salt if you think it needs it and you’re good to go.

A step up and the way I really like to go, especially if you decide to make the burritos, is to char-grill all the ingredients before you blast and it goes something like this…..
Char-grilled tomatillo salsa
You’ll need:
250gr tomatillos (husked)
1 red chilli – of course if you have any fancier Mexican ones this is the time to bring them forth
2 fat cloves of garlic with the skin left on
1/2 onion finely chopped
A handful coriander chopped
1 lime
Salt
Heat your grill as hot as it will go and place the tomatillos, garlic and chilli on a baking dish under it. Grill until the skins start to blacken turning to ensure everything cooks evenly. Let things cool down then remove the top of the chilli (it’ll add bitterness) and take the skin off the garlic cloves then blast everything with a pinch of salt to a coarse . Add purée the onion and the juice of half the lime. Taste and correct the seasoning if necessary then top with the coriander and serve.
Good nachos and beers mean you’ve Friday evening snacks sorted but if you’re looking for dinner you’ve also made a good start. The sour note you get from fresh tomatillos works really well with fatty things like pulled pork and indeed meat in general and I found that the char-grilled version really complemented the honeyed starchiness of this week’s sweet potatoes. I roasted them for maximum flavour then mashed them up and used this as a base which I spread on each burrito followed by some grated Knockdrinna Sheep’s cheese, a generous amount of salsa, a few dollops of sour cream and generous handful of lettuce. Yummmmmmmmmmmm! It was a big hit and I reckon would be brilliant for big groups.
Roast Sweet Potato burritos with chargrilled tomatillo salsa and Knockdrinna cheese( for 2)
You’ll need:
500gr sweet potatoes
olive oil
1 quantity char-grilled tomatillo salsa (see above)
1 tub sour cream
1 head lettuce
150gr Knockdrinna Sheeps cheese grated (goats would also work well)
4 burritos warmed
Heat the oven to gas mark 6 (200 degrees) .Cut the sweet potatoes lengthways, drizzle with olive oil and place cut side down on a roast tin and place in the oven and roast until tender (about 50-60 minutes). While the sweet potatoes are roasting get all the other stuff ready so you’ll be ready when they are. When the potatoes come out of the oven let them cool slightly before scooping them out of their skins and roughly mashing them. Everything else on the table? Beers out of the fridge? Dinner is served!
Have a brilliant week,
Sarah

1 onion finely chopped
A piece of chorizo 3 inches long
1/2 tin (a large handful) chickpeas)
A bunch flat leaf parsley
Olive oil
Lemon juice
Red wine vinegar
Begin by cooking your beans. Cut them in three so you have pieces about an inch and a half long. Drop into boiling water and cook until tender. Drain, rinse under cold water and set aside.
Prepare 1 cup of cous cous. My method involves toasting the grains on a dry (i.e.. no oil) frying pan over a medium heat and this gives them a lovely nutty flavour which adds to your final dish. When they start to turn golden add 2 cups of hot water, turn off the heat and stir until all the water is absorbed and the cous cous is cooked adding more water if necessary. If you find the grains are still undercooked simply turn on the heat again, add more water and cook until absorbed and the grains are done.
Add the chickpeas and onion and mix through the still warm cous cous. Season and set aside.
Roughly chop the chorizo and gently sauté in a little olive oil for a few minutes before adding the beans. Toss everything over a medium heat for another minute then mix into the cous cous making sure to get as much of the chorizo oil from the pan as possible. Dress with a little olive oil, lemon juice and red wine vinegar to taste.
Just before serving roughly chop the parsley and add that in. This dish is great on it’s own is also beautiful served with fish or eggs (I’m thinking omelettes and quiches rather than sunny side up though!)
Enjoy,
Sarah
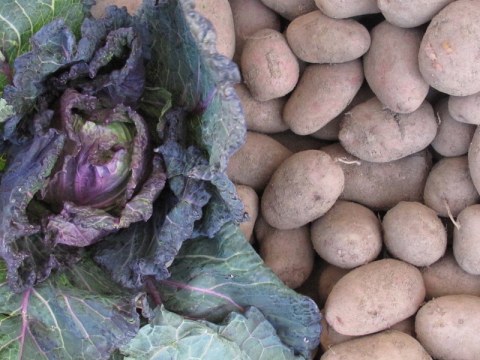
New season varieties plus a berry cake with pear and almond
November 9, 2012

This week’s bag puts us firmly into autumn. New season parsnips in from Denis Healy which I think I’ll roast with honey and thyme, Savoy cabbage (I’m thinking minestrone style soups to ward off the cold and maybe a midweek colcannon) and Oliver Kelly’s leeks which I can’t seem to get enough of. I’ve been poaching them in buttery stock and eating them with quinoa a LOT recently. With a wedge of cheese it’s as much as you need at lunchtime.
Fruit wise, citrus has just started but so far it’s really only green Satsumas but I’d expect Navelina oranges to kick in any day now. Apples and pears are what really come into their own at this time of year. Pears are especially good at the moment but getting them at their best takes a bit of patience. Like peaches, they can go from rock hard to overripe and mealy in less than a day if you take your eye off them. Vigilance is richly rewarded. Get them perfectly ripe and you have a snack or dessert from heaven. Even though they are firm enough to hold their shape and slice neatly, it always amazes me how juicy they are at their peak. They don’t need anything and are one of the nicest stand-alone desserts I know. If you want to gussy things up a bit, try a scoop of ice-cream. Vanilla is classic but chocolate or honeycomb will also work beautifully. Chopped with yogurt and dried fruit makes a great start to the day but in our house it’s porridge first thing so we have them with that and a drizzle of Highbank syrup. Of course they partner beautifully with cheese especially blue. Cashel blue, a handful of walnuts and a honey mustard dressing with this week’s salad leaves would a great lunch or starter over the next day or two. Winter doesn’t mean the end of salads you know, just a few adjustments to the ones you’ve been eating for the last few months.
I used a large pear to moisten a cake recently and it was such a success that I thought I’d pass on the recipe this week. It was a bit of an experiment really. We went out for a walk and got a stash of late blackberries and I decided to throw those in too but it’s the kind of cake that works with any berry. I buy blueberries and raspberries when they’re in season and stick them in the freezer for this kind of thing.
I added ground almonds as it keeps this kind of cake moist for longer and adds a nice weight to things. My idea was to make a cake that would last a few days but as it happened it actually survived one evening. I made it again last week to bring to Schull where we spent midterm break. We munched on it for most of the week and it definitely lasts well. Put it in an airtight tin or wrap it up in tinfoil and it nearly gets better over the few days you’ll manage to keep it.
Boy, do they celebrate Halloween down there. The night before we took the kids on a magical candlelight spooky farm walk. Then on the night itself the whole town went all out. Almost every shop was taken over by the living dead, witches, ghouls or something in between. We watched a crazy nurse perform surgery on a live patient in the fishmongers, visited Dr Frankenstein’s lab for another equally gruesome operation, saw (willing!) children in cages in one of the crazy haunted houses …. Absolutely classic. Our lot took a while to get into to it. What?! It’s not just about sugar and pumpkins? After all there was no lorry load of treats to take home afterward just a small bag of really cool ones.

As Auggie or, rather, Dracula, put it “I prefer the real Halloween, the not scary Dublin one”. Well, they’ll have to get used to it, we’re definitely coming back next year.
Pear and blackberry cake with almond
You’ll need:
200gr light moscovado sugar
200gr butter at room temperature
160gr self-raising flour
3 large eggs
1 level teaspoon baking powder
A little milk
50gr ground almonds
100gr blackberries or blueberries
1 large pear (about 250 gr)
Sieve the flour and baking powder together then set aside. Cream the butter and sugar together until light and fluffy. Beat in an egg then about a third of the flour, followed by an egg then more flour then the third egg and the rest of the flour. Make sure each addition is fully incorporated before the next. Add the almonds along with a dash of milk then turn off your mixer.
Peel the pear and coarsely grate it into the mixture. Mix it in by hand. The mixture will probably curdle but don’t worry. Add the berries. Turn the mixture into a greased 20 cm baking tin and place in the oven Gas mark 5 and bake for about 45 minutes until a knife comes out clean.
Cool down and, ideally, allow to stand for a few hours before slicing. You can dust with icing sugar (or not) before you serve with a nice cup of tea.
Have a brilliant weekend,
Sarah
Winter Warmer – Celeriac gratin with Gruyère and Bacon
October 27, 2012

Ok, so it’s properly cold now. Gratin weather has begun and what better way to start than with celeriac. I’ve gone all out today, roast chicken in the oven, next week’s cake recipe just gone in and a diet busting gratin with Gruyère and lardons is just out, crispy and golden. Yum!!! Auggie and Dan reckon it’s time for lunch. But you just had breakfast guys and it’s celeriac, something you (Auggie) said you’d absolutely NEVER eat (gotcha!!!).Yes, this is perfect food for a cold Autumn day……..
A celeriac gratin with Gruyère and bacon
You’ll need:
1 head celeriac
100gr lardons or any bacon you prefer diced
100gr Gruyère grated
250ml single cream
500ml chicken stock
1/2 lemon
1 large handful breadcrumbs
Squeeze the lemon into a bowl of water and have on standby before you begin. Trim the celeriac of the gnarly outside part. Next, cut in half then slice as finely as possible dropping the slices into the lemon water as you go (this stops them discolouring).
Heat the stock then transfer the celeriac slices into it and bring to the boil then simmer until just tender.
Fry the lardons in a drizzle of olive oil until golden. Transfer the celeriac and remaining stock to a baking dish and toss with the bacon and half the cheese. Add the cream and a generous pinch of salt and grinding of black pepper. Top with the remaining cheese and breadcrumbs.
Bake in at Gas mark 5/180 degrees for 40 minutes until golden.
This tastes great with just about any roast and also makes a lovely supper with a simple green salad.
Curry with green beans and potatoes
October 15, 2012

A busy week meant I kept this dish very simple. It’s the perfect midweek supper. Lots of flavour and ready in less than half an hour. Green beans were the starting point then spuds for bulk and finally cherry tomatoes (colourwise I couldn’t resist!!!) completed the dish.
The fire and heat come from the chili and ginger then for the Indian flavour it’s equal parts coriander powder and turmeric and 1/2 the amount again of cumin seeds. It’s a mix that works with any veg and obviously you can dial the heat up or down by using as much chili as you want. Dried works just fine as well.
A simple curry with green beans and potatoes
You’ll need:
Coconut vegetable oil
1 thumbsize piece ginger peeled and finely chopped
4 heads garlic finely sliced
1/2 red chilli chopped (remove some or all of the seeds if you don’t like things too hot)
1 teaspoon coriander powder
1 teaspoon turmeric
1/2 teaspoon cumin seeds
200gr (1about 12 cherry tomatoes )
About 300 ml vegetable stock
800gr potatoes
200gr green beans
With this recipe you need to have everything ready to go before you start so it’ s a little different to most of my recipes where you throw on an onion and mooch around preparing everything else as it gently fries. This one is more on the fast and furious side. You can do it as you go but you’ll need to be fast. The upside is that the dish is ready in about 20 minutes and you can’t say that about a lot of curries (well, mine anyway).
Right, so to get going have the garlic, ginger and chilli prepared as described above. Peel the potatoes and chop into large bitesize pieces. Wash the tomatoes and cut in half. That should do it for now.
Heat a generous dollop of coconut oil on the pan. Add the garlic, ginger and chilli and gently fry for a minute or two before adding the spices along with a generous pinch of salt. Fry for another minute then add the tomatoes. Gently cook for a couple of minutes before adding the potatoes and the stock. Cook over a gentle heat for about 10 minutes and while this is happening wash, top and tail your beans. Now would also be a good time to put on your rice if you’re having some. Add the beans to the pan. Cook for a further 6 -7 minutes until the beans and spuds are tender. Serve with rice and/or naan bread. This recipe will easily feed 2-3 hungry people, 4-5 if you serve it with some daal.
QR Code Generator: http://daobytes.com/qr-generator/
I think deliveries from Home Organics have converted more than a few of you to the joys of beetroot. Slow roasting has banished all those awful memories of pickled slices that used to feature in that abomination known as the Irish salad circa 1982.
But what about the leaves? Or beet greens as the Americans call them. You don’t see them that often because they don’t last that long. But if you do get your beets with the greens attached be sure and make the most of them. Not only are they delicious in all kinds of salads and completely gorgeous to behold, they are packed with vitamins, minerals and antioxidants. For a super cleansing juice guaranteed to leave your insides gleaming try a few handfuls of the leaves (stems and all) with an apple, a piece of ginger and 2 of this week’s satsumas. You’ll feel like new.
This week’s recipe is so simple. I made it during the summer when we had a glut and I needed to make lunch fast. Beet greens can be bitter so I used a honey dressing with some balsamic for body and flavour. Lots of toasted seeds for crunch then a slab of baked feta as the main event. Ready in under fifteen minutes……
A salad of honey balsamic beet greens with toasted seeds and baked feta
You’ll need:
1 bunch beet greens
1 handful each of sunflower, pumpkin and sesame seeds
1 block feta (200gr)
Dried oregano
For the dressing:
4 tablespoon extra virgin olive oil
1 tablespoon balsamic vinegar
1 tablespoon runny honey
Maldon sea salt
Heat the oven to Gas mark 5/190 degrees. Sprinkle the feta with a little oregano and a few grindings of coarse black pepper then drizzle lightly with olive oil. Wrap in tinfoil and place in the oven and bake for 10 -12 minutes until soft.
As the feta bakes, wash and dry the beets then chop the stalks into 1- 2 cm pieces then the leaves to whatever size pieces you’d like.
Roast your seeds by placing them on a dry pan over the heat until they start to change colour and you can smell them lightly toasting. As soon as this happens take them them off as the next step is burnt (this is the voice of experience talking).
Toss the seeds with the leaves then add the dressing. Top with the cheese and serve immediately.
Have a brilliant weekend,
Sarah


Slow baked spiced autumn fruit
October 3, 2012

I never get colds and am so under the weather. A couple of trips out in the torrential rain to get Dan have done me in. Auggie thought I had to be kidding, couldn’t we just leave him there? Only Lee was safe playing with his butterfly, eating his book, safe in his mobile hothouse. Unlike the others he loves being under that plastic pram cover. Auggie tries to get in beside him and is given short shift by Lee. Nice try kid, I’d be in there myself if I could….
The upshot is that our oven is now on every afternoon warming the kitchen and cooking dinner.We’ve been too busy drying off to faff around chopping veg for soups so I’ve been roasting up whatever’s around whole or halved. Yesterday it was leeks, butternuts and carrots in olive oil with rosemary. I then browned a handful of pancetta in the soup pot, adding hot stock, and a handful of red lentils then roughly chopped up the roasted veggies and throw them in. You let things simmer for about 15 minutes then blend to the texture you like and season to taste. That was dinner sorted while everyone dried off and had hot chocolate.
Fruit is another thing that’s magic done in the oven and at this time of the year you get a lovely mix of end of summer and start of autumn varieties. At the moment plums don’t have the sugar of the high summer varieties but they work beautifully baked with pears. I also love some dried figs in there too but fresh are obviously wonderful but they can be trickier and pricier to track down.
A few weeks ago there were still peaches and nectarines around and and they work really well in this recipe. You can do this kind of dish in under an hour but like most roasting, it tastes better if you give it plenty of time. An hour and a half plus will give you super-sticky, almost chewy fruit gently spiced that’s aching for a dollop of cream.ice-cream or greek yogurt and maybe a handful of crumbled biscuits. We had some with a cheese cake last night and it was as good as it sounds.
Slow baked spiced fruit
You’ll need:
3 large red firm plums (or 5/6 small ones)
6 dried figs
4 medium firm pears
1/2 glass red wine
3 heaped tablespoons light muscovado sugar
The spices
1 cinnamon quill
4 pieces mace
7-8 peppercorns
1/4 teaspoon ground ginger
4 star anise
Small pinch ground cloves
Peel, core and quarter the pears. Halve the plums removing the stones. Place in an ovenproof dish along with figs and cinnamon quill. Mix the rest of the spices with the wine and sugar then pour over the fruit. Cover the dish with tinfoil and bake for 30 minutes at Gas mark 5.Remove the foil and gently turn the fruit over to make sure all sides get coated in wine then return to the oven and bake for a further hour or so until the liquid has reduced to a sticky caramel. Eat warm or at room temperature.
Crispy artichoke salad with cherry tomatoes, Parmesan and Greek olives
September 18, 2012

This week brings artichokes to our Mediterranean and vegetable selections and seeing as there’s only one (they are just soooooo pricey) dishes like artichokes a la Grecque (a lovely stew with coriander seeds and lemon) are out. The way to make them go furthest is to toss them in breadcrumbs and fry til golden. After that, with a spritz of lemon juice you’ve got a brilliant dish to pick on before dinner. A word of warning though, don’t break out your fanciest wine as artichokes tend to do funny things to the taste.
I wanted a dish that would feed 2 people for lunch so I used my fried artichokes as a basis for a salad. I served them with some cherry vine tomatoes from Marc Michel, a handful of those wrinkly Greek black olives and some Parmesan shavings and a very light lemony dressing. The crunch of the artichokes makes the salad more filling and we only used bread at the end to mop up the juices. Yum.
Crispy artichoke salad with cherry tomatoes, Parmesan and Greek olives
You’ll need:
1 globe artichoke
Plain flour
1 large egg
A large handful of dry breadcrumbs (those Japanese Panko ones are brilliant for this)
Enough lettuce leaves for 2 washed and dried
6-7 cherry vine tomatoes quartered
1 handful Parmesan shavings
A slightly smaller handful of black olive, stoned and torn (or left whole if you’re not up to that kind of thing)
For the dressing:
4 tablespoons extra virgin olive oil
Juice of half a lemon
Maldon salt
Freshly ground black pepper
First of all put the dressing together so it’s ready for later. Mix the lemon juice and oil, adding a pinch of crushed Maldon and a good dose of black pepper then set aside.
To prepare artichokes I tend to use a range of implements – a large knife with a serrated blade, a small sharp peeling knife and a spoon. If you haven’t done this before basically with artichokes you only eat the heart which is located at the bottom centre of the flower so for this kind of dish the rest needs to be pared away.
Start by slicing off the stem and about 1 cm off the tough bottom of the artichoke. This will make the tough outer leaves easier to pull or cut off. Now cut off the top part of the artichokes (ie the tougher pointy part).

Pare back any other tough parts until you reach the heart.

Yes, it’s a lot of cutting back and what you’re left with seems paltry. I guess this explains why they never really caught on in a big way but all this work will be worth it – I promise!!

Using your fingers or a spoon scoop out and discard the fluffy stuff you find in the centre.

Slice the artichoke heart into pieces about 1/2 cm thick. Place the slices in a bowl of water then add the juice of half a lemon and a generous pinch of salt. This will stop the artichoke going brown. Leave the artichoke slices to sit for a few minutes while you toss the lettuce, tomatoes, olives, Parmesan and dressing together.

To finish off the salad, drain the artichokes and pat dry. Heat about an inch of vegetable oil in a pan and prepare the artichoke slices for frying by dipping them in flour then beaten egg then breadcrumbs. Add the artichokes to the oil when it’s hot but not smoking otherwise they’ll burn on the outside before they’re done inside. When golden brown, remove from the pan to some kitchen paper sprinkle with salt and black pepper. Sit on top of your salad with a couple of lemon wedges and serve immediately!!!!
Have a great week,
Sarah
The perfect late summer cake
September 8, 2012

This one’s from Nigel Slater who knows a thing or two about good cake. A delicious, almond sponge moistened with peaches and spiked with blueberries. As you’d expect, nectarines work perfectly well if peaches aren’t around and if you can’t get hold of blueberries, I’d wager raspberries work a treat. It’s that kind of cake. One thing though, this is definitely one of those cakes that tastes better the second day. Think of it as character building…..
Nigel Slater’s blueberry and peach cake
You’ll need:
175gr butter
175gr golden caster sugar
200gr ripe peaches or nectarines
2 large eggs
175g self-raising flour
100g ground almonds
1 tsp grated orange zest
a few drops of vanilla extract
150g blueberries
Nigel uses a lined loose-bottomed 20 cm cake tin but I take the easier way out with a greased silicone mould. Dunnes have them for about a fiver. Set the oven to 170C/gas mark 4 and get on with things.
Halve, stone and roughly chop the peaches or nectarines and set aside. Wash and sort through the blueberries removing any remaining stalks.

Cream the butter and sugar together until pale and fluffy. Add one of the eggs and continue beating then add a tablespoon of flour. Beat in the second egg. Mix the flour and almonds together then add to the mixture in 2 or 3 different lots then finally beat in the orange zest and vanilla. Stir in the chopped peaches and blueberries and a splash of milk (Nigel doesn’t do this but I find it helps to moisten things).

Scrape the mixture into the cake tin then bake for 1 hour and 10 minutes. Test with a skewer or sharp knife – if it comes out relatively clean, then the cake is done. Leave the cake to cool for about 10 minutes in the tin then loosen the edges with a palette knife and turn it onto a plate. I decorated with blueberries and icing sugar but it’s up to you.
A blob of mascarpone or Greek yogurt is delicious on the side if you want to serve this for dessert but really it’s an afternoon tea kind of cake. But don’t let that put you off – 11pm is still technically after noon 😉
Enjoy x
Cucumber and peanut salad with lime and ginger dressing topped with crispy scallion tempura
September 3, 2012
Hi there,
Friday was my first day back at work in a while and this is what I brought. I’d been eating it all week and can confirm I’m officially addicted.

Cucumber and peanut salad with lime and ginger dressing topped with crispy scallion tempura
You’ll need:
2 cups cooked brown rice
1 large cucumber diced
2 large handfuls peanuts roughly chopped
1 large bunch coriander roughly chopped
1 bunch scallions
A very small amount (about 2 cm long) of fresh red chilli finely chopped
Self-raising flour
Vegetable oil
For the dressing:
3 tablespoons tamari or soy sauce
2 tablespoons brown rice vinegar
3 tablespoons toasted sesame oil
1 tablespoon olive oil
2 teaspoons rice mirin
The juice of one lime
2 teaspoons finely grated ginger
2 tablespoons runny honey

I generally make the rice ahead of time and have it ready to go before I start. Soak it first (1 cup will be enough) as this cuts down on cooking time and also make it (and all grains incidentally) easier to digest. When it’s cooked, let it cool before you start preparing the rest of the ingredients.
When you’re ready to start, begin with the dressing – combine all the dressing ingredients, mix well then set aside.
I like the cucumber diced so it’s nice and small but it’s up to you.

Take about half scallions and slice them finely. The peanuts and coriander can be roughly chopped. The only thing that you need to chop really finely is the chilli as this can be fiery. I tend to serve kids first before adding this as we like things too fiery for them . Auggie has been known to yell “too spicey!!!!!!!” before he’s even tasted dinner if he’s not in the mood to eat but as an excuse he reckons it’s always worth a shot) When you have all the veg ready, mix it up with the rice. Add the dressing and most of the peanuts keeping some back for decoration.
To prepare the crispy scallions, slice them into pieces about 2-3 cm long. Mix a heaped tablespoon of flour with enough water to make a paste the consistency of runny honey. Heat about 2 inches of oil in a pan. When it’s nice and hot dip the scallions in the batter then drop into the oil and fry until golden.
To serve top each portion of salad with some crispy scallions and a scattering of chopped chilli.
This makes a great lunch but if you’re bringing it to work I’d probably skip the crispy scallions and really, the dish works just fine without them. If it’s dinner you’re after, serve this alongside some pan-fried tofu or a piece of fish and you’re set.
Have a great week,
Sarah
PS: Next week is National Organic Week and we’ll have lots of special offers. Claire will keep you posted so watch out for an email.
Catalan Cooking with Ada Olpu week 3 – Escalivada
August 17, 2012

As aubergines, peppers , tomatoes and barbeques come into season, escalivada is a tasty and easy way to enjoy them: just throw them on the fire!
Escalivada is a traditional Catalan dish prepared on an open fire, as it uses both the flames and the embers, but it can also be done on a barbecue. Done in an oven it will be quite delicious too, just less smoky.
If you want to eat the escalivada along with the rest of your barbeque, start roasting the vegetables while the flames are still there: the skins will char but they are discarded anyway. If you want it for the next day, use whatever heat is left after cooking everything else and maybe cover the barbeque to make the most of it.
Escalivada is delicious on its own and it also goes very nicely with meat (obviously) or fish: cod, herring and tuna are the classical sidekicks. It also works as a pizza topping.
Ingredients:
- Aubergines
- Red peppers
- Onions (and garlic heads)
- Tomatoes
Wash and dry the vegetables. Leave everything whole.
Onions and garlic heads: wrap them in aluminium paper and cover them in embers.
Aubergines: place them on the sides of the barbecue and rotate them from time to time to cook them slowly and evenly . They are done when they become soft and start to crack. Don’t worry if the skin is a bit charred.
Peppers and tomatoes: roast them quickly on the hottest part of the barbecue until the skins swell and blacken. Flame licked is good but keep your hands safe!
As the you finish cooking the peppers and tomatoes, place them in a salad bowl or in a baking tin and seal it with cling film to trap the moisture in. When the aubergines are done, put them in the same recipient and seal again. Don’t forget to take the onions and garlic out of the embers!
Let the vegetables cool down until you can handle them and peel them over the bowl: they are juicy! Discard all the skins and the seeds of the peppers (let the tomatoes’ seeds be unless you really have something against them).
Tear the aubergines and peppers in long stripes, cut the onions in wedges and halve or quarter the tomatoes. Place the vegetables in a serving platter alternating the colours, drizzle with olive oil and sprinkle with salt and pepper. Done!
Basil, parsley or rosemary are not required but go for them if you like.
You can use the roasted garlic heads for an alternative dressing sauce: squeeze the roasted cloves out of their skins, mash with a fork and mix with some of the juices left over from peeling the vegetables and some olive oil.
You can save the leftover garlic cloves for up to a week if you peel them and place them in a jar, covered with oil and refrigerated. Stuff them in a baguette with some grated cheese and you will fall in love with garlic bread again!
Catalan cooking with Ada Olpu Week 2 : Romesco Sauce
August 9, 2012

Romesco is a delicious sauce that goes with fish, meat, vegetables… or a spoon and some privacy.
It originated in the coastal region of Catalunya with two main varieties, the fishermen’s one – with dry bread, and the peasant’s one – with almonds, according to whatever was easily on hand. Nowadays most recipes include both ingredients. Romesco is very popular and there are as many variants as households making it, so feel free to tweak the recipe to your taste.
If you are going to Spain, particularly Catalunya, nyora peppers would make a nice souvenir. They are available dried or in jars (pulp only, so you cut down the preparation time). You could also buy the readymade sauce but I find that most brands have far too much tomatoe and not enough nuts.
I have two different recipes for romesco: “just-back-from-home” or “Dublin-shopping”. These two versions do not taste exactly the same but they both hit the spot. As I cannot get nyora peppers in Dublin, I substitute them for dried ancho chilies. The “just back” recipe is nuttier as there is no bread but the “Dublin shopping” one is speedier and spicier. Also, the proportions are slightly different, as ancho peppers are bigger, fleshier and spicier than nyora peppers as you can see from the picture.

I don’t like it too hot so I tone them down with extra red peppers and more bread.
When fresh red peppers are not in season (or I find them wrinkly and expensive), red peppers from a jar work nicely too, just mind the amount of vinegar you add to the romesco, as the brine might be quite strong.
Feel free to combine both recipes to suit your taste: you will become a fully fledged romescaire in no time!
| Dublin romesco sauce (500 g) | Just back romesco sauce |
|
|
The weights above do not need to be exact, this is a very flexible recipe!

- Pierce the tip of the dried peppers and soak them in a bowl of hot water for about 15 minutes, weighed down with a smaller bowl or dish.
- In a hot oven (180 C), roast the fresh red peppers along with the tomatoes and garlic cloves (or use leftovers from escalivada). On a separate tray, toast the almonds and hazelnuts: about 10 minutes if they are whole, about 5 minutes if they are ground.
- Fry the bread (if using it) in some olive oil and set aside. If oil-conscious, toast it.
- Peel the garlic, tomatoes and peppers (and the whole nuts for the “Just back” recipe). The peppers, both soaked and roasted, should be peeled and deseeded. The easiest way to peel the soaked ones is to place them on a chopping board, open them flesh side up and scrape the pulp out.
- Blend all these ingredients together until you have a coarse paste (don’t forget the bread!). If you need to spend some energy, go traditional and use a mortar and pestle.
- Season to taste with vinegar, salt and pepper and incorporate enough olive oil to get thick sauce.
Make it yours:
- Fry the garlic and the nuts along with the bread
- Keep some of the garlic raw
- Add pimentón for a smoky taste and pimentón picante for a hotter smoky taste
- Blend in some roasted onion
- Add more tomatoes and call it salvitxada [sal-vit-shah-dah] instead of romesco [roo-mes-coo] to… impress your friends!
- Share with your (impressed) friends: double or triple the recipe and use a Thermomix to save time cooking and washing up. Let me know if you want the full instructions for Thermomix!
Catalan cooking with Ada Olpu Week 1 : Coca de Ceba
August 2, 2012

You could call it onion focaccia, you could call it pissaladière… and you would find yourself in the middle of one of those never ending debates about which country invented what. Coca de ceba is but one variant of a traditional dish found all around the Mediterranean: flatbread with toppings.
A note on flour………..
Make sure that the plain flour is really plain: it should not contain any raising agents at all. The easiest way is to order organic flour from Home Organics and get it delivered to your door along with the veggies.
The hard way is to run around several supermarkets reading the list of ingredients on the side of the “plain” flour packages: you will be surprised to see that for most brands they are the same as in the self rising flour (one of those mysteries!). Otherwise go to a Polish shop and look for ‘mąka pszenna’ but it will not be organic.
For a 20 cm by 30 cm tray, you will need:
- 400 g plain flour (white, wholemeal or half each)
- 1 tsp salt
- 1 bag instant yeast (or 20 g fresh yeast)
- 200-250 g water
- 75 g olive oil + some extra for drizzling
- 400 g chopped onions
Prepare the dough using your favourite method. I use the Thermomix as it takes only 5 minutes for both the dough and onions. If you do it by hand:
- Dissolve the yeast in some of the water and set aside.
- Place the flour and the salt in a roomy bowl and push to the sides. In the central cavity, add the yeast mixture, the oil and most of the water.
- Mix all the ingredients together and then knead. If you are using half wholemeal flour or more, you will need all the water and maybe a bit extra. The dough should be soft as your ear lobe and not sticky .
- Place it on a 20 cm by 30 cm baking sheet lined with baking paper or a silicon mat. If the sheet is shallow enough, roll out the dough using a rolling pin. If the borders of the sheet pan are too high, roll out the dough on the counter and then transfer it.
- Wrap the top of the tray with cling film (not too tight but sealing et well) and leave it to rise at room temperature for 1 hour. If you are in a hurry, place it in the oven at its lowest setting (40 C, keep the door ajar if the lowest setting is 50 or 60 C).
- Chop the onion in thin fans and drizzle it with olive oil.
- When the dough has risen, peel off the cling film and start heating the oven to 220 C.
- Using your fingertips, press the dough against the tray to create little holes all over the surface, without piercing it.
- Spread the onion fans over the dough and bake on the lower half of the oven for 20 minutes or until the borders of the dough look done. If the onion starts to brown, cover the coca with baking paper.
- Let it cool on a rack and serve warm or cold.
To make it French you will need:
- 600-800 g of onion instead of 400 g (as they will shrink during the slow cooking step)
- 2 tins of anchovies (60 g drained weight in total)
- Black olives
Proceed as for coca but, instead of step 6, slowly cook the onions in the oil from the anchovies until they are soft and golden. Make a paste with half the anchovies and some water and add it to the onions. Once baked, decorate with the remaining anchovies and the black olives.
Serve with rosé wine from Provence and call it pissaladière instead of coca. If any of your friends makes jokes about the name, cut them a smaller part and explain that the name derives from ‘peix salat’, wich is old Catalan/Provençal for salted fish.
To make it Italian you will need:
- 2 balls of mozzarella
- Proceed as for coca but top the onions with thin slices of mozzarella before baking.
Call it focaccia alle cipolle or focaccia San Remo.
To make coca de recapte you will need:
- Escalivada
- Herrings or anchovies in oil (drained) or canned tuna (from a good brand) or sausages
Use the dough and top it with escalivada and any, or all, of the other ingredients arranged in neat pretty lines.
Holidays!!!
August 1, 2012
Hi there,
We are lucky to heading off for a couple of weeks to my friend Katy’s place in Mallorca for some much needed down time. While I’m away one of our Home Organics’ foodies is going to be at the helm recipewise and you are in for a real treat. Ada Olpu is a Catalan who’s been here in Dublin for many years and she’s agreed to do some traditional Catalan recipes for us. We’ll be kicking off this week with Coca de ceba, a kind of flat bread covered in juicy carmelized onions you might have wondered about in bakeries in Barcelona. It’s a perfect pick me up for that late afternoon slump. Ada is something of a baking whiz so she’s the perfect person to fill you in on how to get it just right. Next week there’ll be a masterclass in romesco that amazing sauce you only find in Catalunya (as far as I know!) and the week after Ada talks us through the great Catalan classic Escalivada. Enjoy!! x
Sarah
Griddled apricot salad with fresh mozzarella, basil and lemon oil with toasted pinenuts
July 27, 2012

The sun is shining and the living is easy (just as long as you don’t turn the news on that is) yes folks, it’s summer. Or at least today it is. The soft fruit season is in full swing and you can’t move for berries, all kinds of plums, water melons, peaches and late season apricots. They should be long gone but this year’s apricots are still around and seem to be all the better for their tardiness. Lee’s been lapping them up with baby rice and everyone else has just been eating them on a smash and grab basis although some (I’m looking at you Auggie) don’t realise that the stones don’t just go anywhere when you’re finished but you know these days in the grand scheme of summertime chaos a few apricot stones mixed in with the lego or down the sofa is small potatoes. Yes, I’m new to this 3 kids business but catching on/giving up fast .
When I’m not wondering how I’m going to survive the next 20 years, I’ve been playing around with all this apricot booty on the griddle pan applying a what’s good for peaches logic to them and it works. A light coating of olive oil first is all that’s needed and for this I find hands work best. The cooking process softens them up, carmelizing them on the outside and making the flesh lovely and jammy (overdo it and you’ll get mush so don’t leave them on too long – I find 2 mins is enough) and you get those fab go faster stripes. Ok so I know that this isn’t an end in itself but it’s a major plus in my book…….. After that your options are both sweet and savoury. Serve them with vanilla ice-cream and a few sprigs of basil (in thanks to Denis Healy this week – use asap!!!) and a drizzle of maple syrup for a seasonal dessert tonight. A glass of Sauternes would make this really special….
On the savoury side try a salad with some of Denis’ lovely lettuce, mozzarella and a lemoney basil oil. A dish that’s as gorgeous as it looks. Summer on a plate……..
A salad of griddled apricots, fresh mozzeralla, toasted pinenuts with a basil and lemon oil
You’ll need:
Half a head lettuce carefully washed and torn into largish pieces
1 ball fresh mozzarella
8 ripe apricots
1 tablespoon pinenuts
Olive oil
Balsamic vinegar
The basil oil
A handful of basil leaves
4 tablespoons olive oil
pinch Maldon sea salt
1 tablespoon pinenuts
About 2 tablespoons lemon juice
First of all, toast all the pinenuts (2 tablespoons). Make the basil oil – wash and dry the basil leaves removing any tough stalks. Blend until smoothish with the oil, a generous pinch of salt and 1 tablespoon pinenuts. Stir in 1-2 tablespoons lemon juice to taste then set aside.
Begin heating a heavy griddle pan. Spread some olive oil on a plate.

Cut the apricots in half, place them face down on the oil and flatten them slightly with the palm of your hand. transfer to the hot pan and griddle for about 2 minutes each.

Turn them over for about 1 minute before removing them from the pan.
To put the salad together, toss the leaves with a little olive oil and balsamic and lay out on large plate. Drizzle the basil oil on top then slice the mozzarella and arrange this and the apricots . Finally, scatter the pinenuts over everything and retire to a sunny spot to enjoy your lunch.
Have a brilliant weekend,
Sarah
The first (of many!!!!) summer salad with broad beans, vine tomatoes and feta with sumac croutons
June 29, 2012

It might be windy. It might even be rainy. But it is officially summer here in Dublin and salad is back on the menu at ours. Yay!!!! So, without further ado (it’s been a long day especially without Claire in the office and there’s a barbecue that’s just been lit calling me) here’s my suggestion for this week’s lovely broad beans, tomatoes and that gorgeous lettuce…. a salad with giant croutons. The croutons make it a bit more substantial than your average summer salad aswell as giving the whole thing a lot more chew which I really like.
Now these aren’t those croutons you buy in bags with weird powder on them these guys are homemade and all the better for it. I made mine with stale ciabatta I stashed in the freezer a few weeks ago (I love it when a plan comes together!) and I laced them with sumac. Sumac, if you’re not familiar with it, is a dark red lemony spice found in middle Eastern cooking which you’ll find in good delis or middle Eastern shops. I also threw in some feta (predictable? moi?) . The dressing was pretty simple – lemon and olive oil with a splash of balsamic for richness but I also added some crushed garlic for bite. A chive and sour cream omelette on the side and that was lunch. Yum.
The first (of many) summer salad with broad beans, vine tomatoes and feta with sumac croutons
You’ll need:
1 Little Gem lettuce washed, dried with the larger leaves torn
300gr (a large handful) cherry vine tomatoes halved or quartered depending on the size or 2 large vine tomatoes chopped
500gr broad beans
100gr feta cheese
2 thick slices ciabatta crusts removed
olive oil for frying
For the dressing
4 tablespoons extra virgin olive oil
Juice half lemon
1 fat clove garlic
Balsamic vinegar
Maldon sea salt
A pinch of sugar
Make the croutons first by cutting the bread into large chunks. Heat some olive oil on the pan and when it’s hot, add the bread and fry until golden adding a little more oil if things start to dry out too much. Take off the pan and drain on kitchen paper while you get everything else ready.
Make the dressing by first smashing then finely chopping the garlic. Whisk it with oil, lemon juice, a pinch of sugar, a dash of balsamic and a pinch of crushed Maldon and set aside.
Pod the beans then steam for about 3 minutes. Rinse under cold water then pop each one out of it’s skin. Toss the lettuce, beans, tomatoes and feta together with the dressing.
To finish things off, sprinkle each crouton with a little sumac and place on top of the salad. Bring to garden, sit and hopefully don’t have all the napkins blow away like we did last night! Lee was very confused…………
Enjoy.
Have a brilliant weekend,
Sarah
Roasted ramiro peppers stuffed with cavelo nero, quinoa, cracked coriander seeds and feta
June 22, 2012

Another school run in the rain like this morning and I’ll be googling home schooling. Believe me I’m so not the type but enough is enough. There’s a little Gem lettuce in your bag but instead of summer salad I’m thinking about this recipe I saw in last Saturday’s Guardian. Where are you summer??????
Ramiro peppers are around again and I love them. Not quite as juicy as the bell variety they are brilliant for stuffing because they don’t get as water-logged in the oven. We have gorgeous cavelo nero kale from Denis Healy’s farm this week and I decided to use that as part of a stuffing for this week’s recipe. I pan-fried it with onion, garlic and coriander seeds. These days instead of the usual breadcrumbs or cous cous, I find myself reaching for quinoa more and more. As a topping it gets lovely and crunchy so it’s kind of like having nuts or seeds in the mix without actually having them there if you know what I mean. I offset the crunchiness by serving the peppers with some salted yogurt, one of my new favourite things (the others all involve sugar I’m afraid). It’s simply yogurt – with salt! Just a pinch will do then a spritz of lemon and a drizzle of olive oil. I haven’t quite figured an exact recipe but so far it’s been great with things like lamb, falafel, carrot and cumin salads, beetroot salads etc etc.
Roasted ramiro pepper stuffed with quinoa, cavelo nero, cracked coriander seeds and feta.
You’ll need:
1 Ramiro pepper
1/2 cup quinoa (precooked)
1 small bunch cavelo nero kale shredded with any tough stalks removed.
1 smallish onion finely chopped
3 fat cloves garlic
2 teaspoons coriander seeds cracked and very roughly ground with a mortar and pestle
50gr feta cheese crumbled
Olive oil
If you haven’t cooked quinoa before, it’s a cinch so don’t panic. I pretty much follow the same steps I follow for cous cous – roast over a dry pan, add about 3 times the amount of hot water I did quinoa plus a pinch of salt then cook over a moderate heat til done. For half a cup it’ll take about 12 minutes. Read this post if you’d like a bit more detail on how to proceed. When it’s done, stir in a little olive oil to stop it sticking then set it aside.
Heat some olive oil on the pan. Begin frying the onion with the coriander seed and as it begins to change colour add the garlic. Cook for another minute or two then throw in the kale. Fry everything until the kale has wilted and softened. Add the quinoa and feta and mix well. Season with salt and pepper.
Slit the pepper down the side and remove the seeds. Fill each half with the quinoa and kale mix. For this I find hands work best. Drizzle with a little olive oil and bake in the oven at gas mark 6 for 25 minutes. Serve warm with some salted yogurt.
And for dessert…….
Cherries of course!!!!!!!!!!!!!! (unless you’ve already snaffled them)
Have a brilliant weekend,
Sarah
Moro style fried spiced cauliflower
June 15, 2012

As you know, we don’t do a whole lot with cauliflower in this country with the Indian aloo gobi being as adventurous as most of us get usually. A few years ago I discovered the joys of roasting it with lemon, garlic and chili and that was a real game changer. I had no idea it could go in the oven (turns out you can roast broccoli too but we’ll leave that for another day).

I was flicking through Moro East, one of our favourite cookbooks which got an outing on Monday night when we made lamb kofte (pg 234 and yum!) and found this week’s fried spiced cauliflower recipe. You may be familiar with the other Moro books, they’re all pretty Spanish/Muslim Mediterranean based. This one is about the produce they grew in a London allotment they had which was built over for the Olympics so is no more. The recipes, while Mediterranean, are more Turkish, Cypriot and Kurdish in flavour. There are tons of interesting ideas for veg and very often they’re quite simple. As always with the Moro books, the photography is gorgeous. It’s often found off the shelf and lying around in our kitchen as it’s a great one for ideas.

Moro style fried spiced cauliflower
You’ll need:
1 medium head cauliflower – stalk removed, broken into florets
1 teaspoon coriander
1/2 teaspoon cumin seeds
1/4 fennel seeds
8 peppercorns
Sunflower or olive oil for frying
Maldon salt
Lemon wedges
Grind the spices in a mortar and pestle then set aside.

Pour 1cm depth oil into a large pan or sauce pan and heat. When hot, add the cauliflower and fry on all sides until tender and slightly golden. This will take about 10 minutes. The Moro recipe warns that the oil will spit but I didn’t find this was a problem. When the cauliflower is ready drain on kitchen paper and season with Maldon salt.
Mix the spices with a little salt and scatter half the mixture over the cauliflower. Serve with lemon wedges on the side and the remaining spices in a little dish for dunking as required. Highly addictive!!!
Have a brilliant weekend,
Sarah

Yesterday they said there’d be more rain in the next 36 hours than there is in a month usually. As we know that’s saying a LOT. Makes my salad idea for this week’s recipe seem like a bit of a non-runner doesn’t it? So, I made baked potatoes with this week’s new spuds for a comforting, forget about the weather kind of lunch today. I parboiled them first then rolled them in olive oil and sea salt. That way you get that lovely moreish crispy skin (we need a treat). I also added some rosemary for flavour and brilliant antioxidant properties.
Serve with some butter, olive oil or some garlic mayo for the ultimate in comfort eating. I ate mine with some of those asparagus we got in yesterday which I lightly steamed then seared on a burning hot pan. I finished them with a dressing of olive oil and lemon juice and threw on some Parmesan shavings – yum yum. Some of this week’s broccoli lightly steamed and dressed in extra virgin olive oil would be lovely too………
Salt crusted baked new potatoes with rosemary
You’ll need :
1k new potatoes
Olive oil
1 heaped teaspoon sea salt
A couple of sprigs rosemary
Parboil your spuds until just tender then toss in a drizzle of oil and the salt. Throw onto a baking tray and roast with the rosemary at gas mark 7 for about 30 minutes.
And for desert…
This week’s apricots are the obvious choice. If the rain keeps up and you want a project you could do a lot worse than to make an almond tart with them (and it’s not half as complicated as it sounds – I promise! ).
Have a brilliant weekend,
Sarah
 The first of the Marc Michel’s baby salad leaves are in your bag this week and I ate them with this week’s new potatoes. It was just one of those days. Summery but not sunny, weekendy but still Friday…… you get the idea. This is one of those any occasion dishes. Could be lunch or with a piece of grilled fish or an omelette it could be dinner. Easy. I’m not in the mood to cook more than once these days.Except for desert that is. I’m currently fiddling with a recipe for a kind of jammy rhubarb and almond slice thingy. Recipe will follow if things go well.
So, the salad. Simple really. Boiled spuds, roughly chopped, with Greek olives, Killeen goat’s cheese, Marc’s baby leaves and a few chives sniped from the pot outside the back door. The dressing was a classic honey and mustard job with sherry vinegar but balsamic or red wine would do just as well.
A new potato salad with baby leaves, olives, chives and Killeen Goat’s cheese (serves 4 )
You’ll need:
1k new potatoes scrubbed
2 big handfuls mixed baby leaves
150gr semi hard goat’s cheese such as Killeen
A handful olives – I used those shrivelled Greek black ones but it’s up to you
A few chives
A small handful pumpkin seeds toasted
The dressing:
4 tablespoons olive oil
2 tablespoons sherry vinegar
1 heaped teaspoon wholegrain mustard
2 teaspoons runny honey
A pinch of Maldon salt crushed
Scrub the potatoes and bring to the boil then simmer until tender then drain and set aside to cool. Make the dressing by whisking all the ingredients together (or shaking them up in a jam jar!). Stone the olives and tear them up a bit. Dice the the cheese. When the spuds have cooled chop them into bitesize pieces and toss with the cheese, olives, pumpkin seeds and dressing. Lay on the salad leaves, top with some chives and serve.
Enjoy x
A fresh chestnut mushroom salad with lemon, Parmesan and smoked paprika plus barbecue ideas for tonight
May 28, 2012

Summertime is here!!!!! Like any self respecting Irish person I got sunburnt on the first day- A 20 minute walk at 10.30 in the morning and that was it – bright red around the neck. The kids were all factor fiftied up and I thought I’ll be grand with a bit of hastily applied vintage factor 20 (that 50 does leave terrible stains on clothes) and since then I’ve been wafting around swathed in scarves trying to work a Berber chic look but mostly looking a bit overdressed. Just as long as I don’t set fire to the scarves or myself at tonight’s barbecue. Did I just casually say “tonight’s barbecue”? Like we live in Australia? Yes I did.
Most veg tastes great from the barbecue especially if you can rustle up an aioli to go with them so I’m not worried about planning things too much. I’ve got more important things to think about like which nail varnish I’m going to paint my toenails when I’ve finished this. Lee is now napping on a semi regular basis of a morning and I don’t know myself. Some pan con tomate (Catalan style toasted bread rubbed with tomatoes) is always great and a brilliant filler upper if everyone’s hungry before things are ready.
I’ll definitely be doing some of last week’s fennel. I would bet one of my children (washed and returned by um ….next Friday…ish) that quite a few of you have some of it still lurking at the back of the fridge so do give it a try. Carrots with curry spices are also great. Today’s artichokes can be trimmed back a bit then drizzled with a little olive oil and wrapped in tin foil. Sit them on the outer edges of the grill to steam slowly while you do everything else. Eat dipped in your nicest olive oil, butter or aioli.
This week’s chestnut mushrooms are great for skewers with cherry tomatoes and halloumi which I love drizzled with pesto or just a spritz of lemon juice. They also make great salads. I’ve currently got mine marinating in lemon juice, olive oil, garlic and parsley. The mushrooms “cook” in the dressing and all the ingredients blend nicely. To serve, you just top with some Parmesan shavings and smoked paprika. A dish of toasted pita and it’s off to the garden with me. Paul has the kids today because I am officially “working” so not a word……
A fresh chestnut mushroom salad with lemon, Parmesan and smoked paprika
You’ll need:
300gr chestnut mushrooms wiped and sliced
A handful Parmesan shavings
Smoked paprika
For the dressing:
4 tablespoons olive oil
Juice half lemon
A dash of balsamic vinegar
2 cloves garlic very finely minced
A handful parsley finely chopped

Combine all the dressing ingredients adding a pinch of salt. Pour the dressing over mushrooms and mix well. Set aside for a few hours – at least 2. To finish off, check the seasoning adding a little more salt and lemon juice if necessary then top with a pinch of smoked paprika and a handful of Parmesan shavings. Serve with toasted sourdough or pitta bread.
Have a brilliant week,
Sarah
Pak choy with orange sesame noodles
May 24, 2012

Like all greens, pak choy is really good for you (duh!!) – lots of dietary fiber, vitamin A, C, K, B6, Folate, Calcium, Iron, Magnesium, Iron, Potassium and Manganese and despite having all this it’s not even fattening (yay!!). The way forward is Asian flavours and cooking so dust off your wok (a pan will do fine if you don’t have one) , grab some ginger, garlic and soy sauce or tamari (a healthier Japanese version).The white stalks are edible but will take longer to cook than the leaves. What I do is slice the stalk (about 1 inch thick) then tear the leaves in half or leave them intact if they’re small. Heat a little oil (as I mentioned before I’m loving coconut oil for this kind of thing as it takes high heat) toss in some minced, garlic, ginger and chilli. Stir-fry for a moment then throw in the pak choi stalks, toss for about 2 minutes then add the leaves. Allow them to wilt then turn off the heat immediately or they will start to get mushy. A dash of soy or tamari is all you need to serve. I love it with stir-fried tofu and some rice topped with lots of toasted sesame seeds and a drizzle of toasted sesame oil.

Noodles are another way to go and last night I used carrots and scallions along with the pak choy to make very tasty meal. I made a stir-fry sauce with freshly squeezed juice to add a little sweetness to the dish and it worked out really well…
Pak Choi stir-fry with Orange Sesame noodles
You’ll need:
1 bunch scallions sliced
1 large carrot,washed, peeled and cut into thin strips
1/2 red chilli -remove the seeds if you don’t want things too hot
A piece of ginger about 5cm long peeled and grated
1 clove garlic crushed
1 head of pak choi
200gr egg or soba noodles
1 tsp clear honey
Juice of 1 orange
4 tablespoons dark soy sauce or Tamari
4 tablespoons toasted sesame seeds – do this on a dry heavy pan over a medium heat.When they start to change colour they are done.

Prepare the noodles then rinse in cold water, drain and leave for later.

Mix the honey, orange juice, soy sauce and a level teaspoon of grated ginger together in a bowl and set aside.
Heat some vegetable or coconut oil in a wok or frying pan over a highish heat. Toss in the chilli then the carrots and spring onions and stir-fry for 2-3 minutes. Add the garlic and remaining ginger, toss for a moment then throw in the pak choi. Stir -fry for about 2-3 minutes. Add in the noodles and toss everything together until they are piping hot. Finally, pour in the sauce, mix everything well then take off the heat. Top with the sesame seeds and serve immediately.
A gratin with all that fresh Wicklow booty
May 11, 2012

Yes folks, the summer is coming (are you listening weather gods? The summer IS coming) but it’s a little, ahem,sluggish (hailstones??????????) in asserting itself. It’s way too chilly for May and what about all that rain? If only I could make frizzy hair work…
The cold prompted me to plan a whole day’s cooking based round the oven yesterday. The house is warm and smells amazing. I’m slow roasting lamb shanks a la Hugh Fearnley Whittingstall with olives and white wine . He calls for Gas mark 3 for 2 hours but I’ve dialled this down and am going for an all dayer on Gas mark 1. I also have a tray of slightly over the hill tomatoes roasting away with oregano and chilli. Again, these guys will be in for most of the day but we’ve just had a few of the more done ones for lunch). Earlier on I made this week’s fresh garlic and rainbow chard gratin in from Denis Healy’s farm, in Wicklow which was set off nicely with the tomatoes.
Fresh garlic is mild, tender and almost onioney so you use lots more of it than the regular kind. It’s lovely in omelettes and fritattas and gently fried with chilli will make a great pasta sauce. The rainbow chard is a favourite of mine. Tastewise, it’s like spinach but you get all those lovely colours as a bonus. I tossed the two in olive oil until tender then layered them up with some finely sliced spuds, grated cheddar and Pecorino. Yes, it was as tasty as it sounds.

Fresh garlic and rainbow chard gratin
You’ll need:
1 bunch rainbow chard
1 bunch fresh garlic
Olive oil
1k potatoes
200 ml single cream
200 ml milk
Salt and pepper
100gr cheddar cheese grated
75gr Pecorino cheese (Parmesan will also do)
Begin with the spuds – peel then slice them thinly (about 2 mm thick) If you have a mandolin this works brilliantly for this. Put them in a pot of salted water and bring to the boil and get on with things.

Wash and trim the garlic. You can keep the green parts. Roughly chop it all and begin to sweat in a generous glug of olive oil. Wash the chard and chop the stems to lengths about 1 cm long. After about 5 minutes you can add these to the pan. Shredded the chard leaves and add this to the pan after a further 5 minutes. Toss everything together until the chard wilts then take off the pan and allow to cool down a bit.
When the potatoes have come to the boil, drain them and set aside. Combine the milk and cream adding a generous pinch of fine salt and lots of black pepper.
To put the dish together lightly grease a gratin dish with some olive oil and add a layer of potatoes (about 1/5 of what you have). Follow with about 1/3 of the chard and garlic and 1/4 of your cheese.

Continue layering like this ending with a layer of spuds and a final sprinkling of cheese. Pour over the cream and milk then cover with tinfoil and put in the oven at Gas mark 5 and bake for about 50 minutes removing the tinfoil after the first 25 minutes. It’s ready when the spuds are super tender and the crust is golden. Allow to sit for about 10 minutes before serving.
As I mentioned rainbow chard makes lovely fritatta. Try this recipe with Parmesan if you want to give that a try. Or there’s stirfried with lemon, chili and garlic which makes a great sidedish.
Have a great weekend,
Sarah
An early summer salad with pink radishes, rocket, avocado, feta and toasted sunflower seeds
April 27, 2012

Radishes are in from Denis Healy this week and they are so nice to look at that it seems a shame to eat them. But don’t let that stop you for too long they are best super fresh. Crunchy, peppery and above all PINK, they make any salad look good. Famously they only have 1 calorie per piece so make the ultimate guilt free snack (summer is on the way you know and there will hopefully be some bearing of flesh).
The French eat them dipped in salty butter with crusty bread as a pre-dinner appetizer and on a lazy summer’s evening what could be nicer? But let’s not get ahead of ourselves just yet. The only trips to the garden I’ve been making recently have been mad dashes to get clothes off the line.
I really love radishes with avocado where their peppery bite gets to play off the creamy perfection that is a ripe avocado. This week’s recipe is very simple – finely sliced radishes and chopped avocado to start then with rocket from Denis, toasted sunflower seeds and some crumbled feta. The perfect summer lunch or what? Even if you do have to eat it in the kitchen……..

An early summer salad with pink radishes, rocket, feta, avocado and toasted sunflower seeds
You’ll need:
A bunch of radishes washed and finely sliced
2 big handfuls of rocket (or any other salad leaves you fancy)
1 large ripe avocado
A handful sunflower seeds toasted
100gr feta cheese
For the dressing
The juice of 1 lemon
3 tablespoons extra virgin olive oil
A large pinch Maldon salt crushed
First of all, make your dressing by mixing the lemon juice, olive oil and salt together then set aside. Wash the rocket getting rid of any really stalky bits. Chop up the avocado. To finish you can then toss everything together and dress or, as I did, dress the rocket then lay the feta, sunflower seeds, radishes and avocado on top. That way it looks prettier and you can kind of pick and mix as you eat. As you can see from the photo I also added a final grating of lemon zest for colour. Enjoy.
No recipe required – midweek curries with whatever you have in the fridge plus Madhur Jaffrey’s Chicken with spinach
April 23, 2012

Absolutely everyone loves a curry. It’s weird -people who won’t eat local food in places like Spain and Portugal will all eat curry. In our house anything curried goes down a storm even with the kids who moan about the tiniest bit of ginger making their juice “too spicy!”. And it doesn’t have to be fancy either. Got loads of random stuff at the back of the fridge and don’t fancy soup? Make curry instead. Now, I’m no expert and most of my curries are, shall we say, on the not very authentic side but somehow they always seem turn out ok.
From some cooking I did alongside an Indian girl in Barcelona I know that a good way to start is with lots of slowcooked onions which is pretty much how I start most dishes. I sweat these in plenty of rapeseed or coconut oil over a low heat til they start to go mushy then throw in lots of garlic (not only because it tastes good but because it’s so good for you). Keeping cooking until the garlic softens then add a pre-mixed curry powder (I’m currently working my way through a tin of Madras but it’s whatever you fancy) along with a little chilli for extra fire. Normally I then throw in a few chopped tomatoes (a tin will also work fine) and cook these down a bit before adding some coconut milk (told you this wasn’t kosher!)
While all this is going on, I’m furiously peeling and chopping what, in any other dish would be a waaaay too random selection of veg – parsnip, carrot,cabbage (red, white and green) celery, fennel, sweet potatoes, mushrooms, cauliflower, spuds……pretty much anything works. In they go and I’m onto rinsing a tin of chickpeas. These get thrown in with some water or stock then it’s sit back and let things cook. If I’m using greens, they go in at the end as do courgettes and broccoli (they go to mush otherwise) and I’m also partial to a handful of sultanas at this stage. Serve with rice and some chutney and pickles – we’re enjoying a lime one from M&S at the moment that one of you recommended (thanks Penelope). Easy, peasy, lasts well in the fridge and it rocks the next day for lunch with flatbread.
When it comes to the real thing, I’ve always found Indian food to be such a complex mix of spices and flavours that unless I pay very close attention to a recipe book I usually don’t have a clue where to start so I tend not to bother with it unless I’ve got lots of time (so that means never at the moment). Plus, there are usually so many spices required that I’m frustrated before I start (when I’m ready to cook, I’m ready to cook). Paul is the one with the patience/OCD tendencies for all that assembling of ingredients and precision grinding of spices. He also does a mean matchstick of pretty much any root veg but I warn you – bring snacks because dinner’s at midnight.
Recently, Indian cooking guru MadhurJaffrey completely changed this for good when she brought out Curry Easy, a book that seeks to do the previously unthinkable – simplify and speed up Indian cooking. She says herself that over the years (she’s now in her seventies) her cooking had changed and that some of the processes she’d previously considered essential she has recently discovered can be done in different ways. So, instead of cooking for hours there’s lots of marinating to really let the flavours sink in before you even start. There are also fewer spices (well, usually 6 or 7 but not the 10 -15 that you find in her other books) so there’s less faffing around. I feel like I’m starting to understand how to build Indian flavours without a recipe and I find myself using more in other cooking.
We’ve been cooking our way through this book for a while and everything we’ve made has been amazing. First of all, we tried the Chicken Karhai with Mint which involved marinating everything overnight then simply frying it up and it was superb. We served it alongside Aubergines with Tomatoes which were also great. After that we were hooked. Standouts so far have been Chicken with apricots, Masala fish steaks and the green lamb curry.

I have earmarked this week’s spinach in from Denis Healy in Wicklow for one our favourite dishes from the book which I’m going to share with you – Chicken with spinach. I haven’t changed anything except lower the quantity of oil used. It’s very quick and fantastically moreish.This recipe feeds 2 with leftovers.
Madhur Jaffrey’s Chicken with Spinach
3 chicken legs separated into drumsticks and thighs weighing about 1k in total
Salt and freshly ground black pepper
1 medium onion roughly chopped
2.5cm/1 inch piece ginger, peeled and roughly chopped
3 cloves garlic, roughly chopped
1/2 tablespoon sweet red paprika
1/4 teaspoon cayenne pepper
2 tablespoons olive/ rapeseed oil
1 x 5cm/2 inch cinnamon
4 cardamom pods
150g/ 5 oz spinach, chopped
Spread out the chicken pieces and sprinkle with 1 teaspoon salt and lots of black pepper on both sides
Put the onions, garlic, ginger, paprika and cayenne in the food processor and chop all the ingredients as finely as possible taking care not to allow things to go to mush.
Heat the oil in a large pan or wok. Add the cinnamon and cardamon letting them sizzle for a few seconds before adding as much of the chicken as will fit in a single layer. Brown the chicken pieces on both sides then remove to a bowl leaving the spices behind. When all the chicken is cooked add the onion mix to the pan and fry for about 5 minutes until most of the liquid has evaporated taking care to stir as you go so thing don’t stick and burn. Add the spinach and 1/2 teaspoon salt and cook for a further 5 minutes. Add the chicken, 1/4 teaspoon salt and 12oml/4 fl oz water. Bring to the boil, cover and lower the heat then gently simmer for about 30 minutes. Any excess fat can be removed before serving with boiled basmati and nan bread
Enjoy!
This week there’s also celery in our selections and I notice how Guardian columnist Yotan Ottolenghi has been using the leaves and inner tender stalks for salads a lot recently. Last Saturday’s Avocado, radish and celery salad with spiced croutons and lime is on my to-make list for this week – sounds fab right? Our larger bags have radishes from the Healys and I’m hoping to secure enough for all our bags next week.
Have a brilliant week,
Sarah
What to do with the last of the root veg………..
April 18, 2012

More usual in our house though, is the vegetarian route and last night was no exception – I made honey roasted beets and parsnips then a lightly dressed warm lemon cous cous salad with toasted sunflower seeds and some baked goat’s cheese .It’s a combination that’s easy to prepare and always goes down a storm.
I think the best way to go is to boil the vegetables first (separately or everything will go pink and it is nice to have the 2 colours) so the roasting doesn’t take too long. This way, once the veg is in the oven you’ll have enough time to do the cous cous, slice the goat’s cheese and of course have at least one glass of wine.

Balsamic Roasted Beetroot and Parsnips (for 2)
You’ll need:
600gr Parsnips
600gr Beetroot
Olive Oil
Balsamic Vinegar
Honey
Start with your beetroot as they’ll take the longest. Wash but don’t peel them or all their lovely colour will leech out. Cover in water and bring to the boil then simmer til done (ie until you can easily stick a knife through them). This will take anything from 40 minutes to an hour for really big bulbs. When they’re ready take them off the heat, drain and allow to cool slightly. Peel and cut each Beetroot into quarters or eighths depending on the size.
While the beetroot are cooking, you can get on with the parsnips. Wash, peel and cut into chunks or lengths. Boil in salted water until tender (this should take about 15 minutes).
When the vegetables are ready, heat your oven to Gas mark 6 or 200 degrees and warm some olive oil on 2 non stick baking trays (roast the veg separately too to avoid turning the parsnips pink). When the oil is hot, add your veg along with a generous drizzle of honey. Toss well then put in the oven. After about 25 minutes toss again to make sure things cook evenly. Return to the oven and roast for another 25 minutes, then add a dash of balsamic vinegar, toss and return to the oven for another 15 minutes or until everything has carmelized nicely. Season with salt and pepper and they’re ready to serve.
The Cous Cous and baked Goat’s Cheese
You’ll need:
Cous Cous
Sunflower Seeds
Lemon Juice
Olive Oil
2 rounds Chevre Goat’s Cheese about 1 inch thick
Rosemary or thyme
Olive oil
Prepare enough cous cous for 2 and dress with some nice olive oil and lemon juice. Toast some sunflower seeds on a dry pan and throw them in.
The baked goat’s cheese is simple -drizzle with olive oil and top with herbs (I used thyme) then bake the rounds on a tray for about 8 minutes. When you think the veg is starting to caramelize, throw them into the oven and everything will be ready together. If you want to make things really special marinate the cheese in oil with some rosemary and thyme a la Alice Waters. This can be done the day before and really brings up the flavour of the herbs in the cheese.
In case you were wondering……..
The leaves in your bag with white stalks are pak Choy and they should be steamed or stirfried with garlic and ginger. The other leaves are baby(ish) Wicklow spinach
Hope you enjoy the recipes, have a great week,
Sarah

